Generate PDF form step
If you need to generate a report from a step, or download data to share on a custom template, use this no-code step for best results. The template enables you to:- Embed images and signatures in the PDF (images are auto-compressed to 500KB)
- Stay compliant thanks to a timestamp showing the generation date.
- Have a clean output as all empty fields (optional and conditional) are filtered out and the PDF is generated with margins.
- In your workflow, click + Add step.
- Click Templates > Next Matter templates and search for PDF.
- Click the Step to PDF template to add it to the workflow.
-
Update the placeholders in the template body with your workflow ID, instance ID, and step ID of the step you want to export. Tip: You’ll find the data reference to the instance ID when you click {} in the Body field.
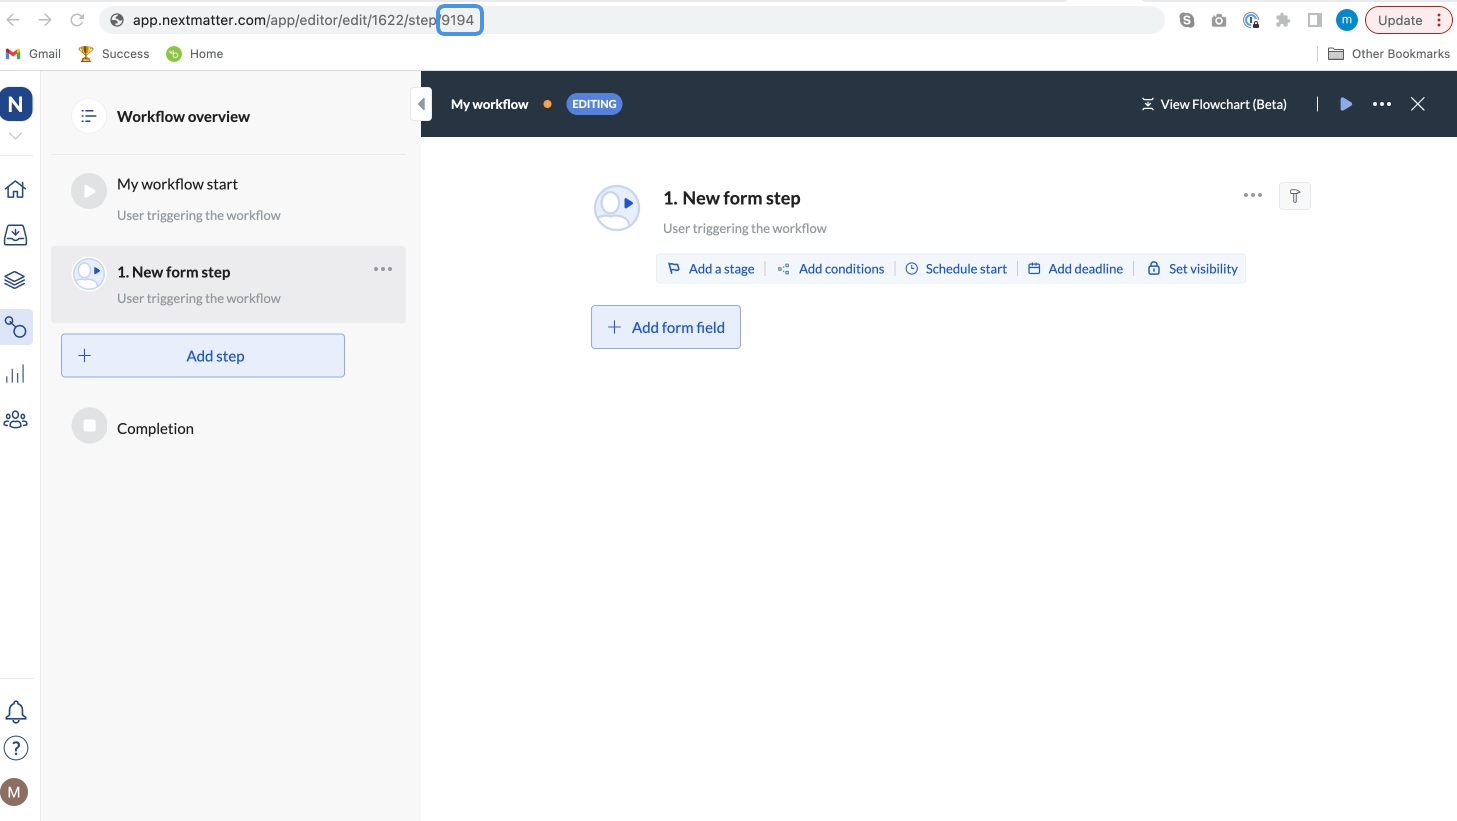
Where is the step ID
- In your left-hand navigation, click the Workflows icon.
- Hover over the follow-up workflow and click on the menu icon.
- Click Edit workflow.
- Click the step to which you’d like to send data.
- Copy the step ID. It’s the last number in the URL you see in your browser.
Where is the workflow ID
You can get the ID by clicking the follow-up workflow and copying the number from the URL in your browser.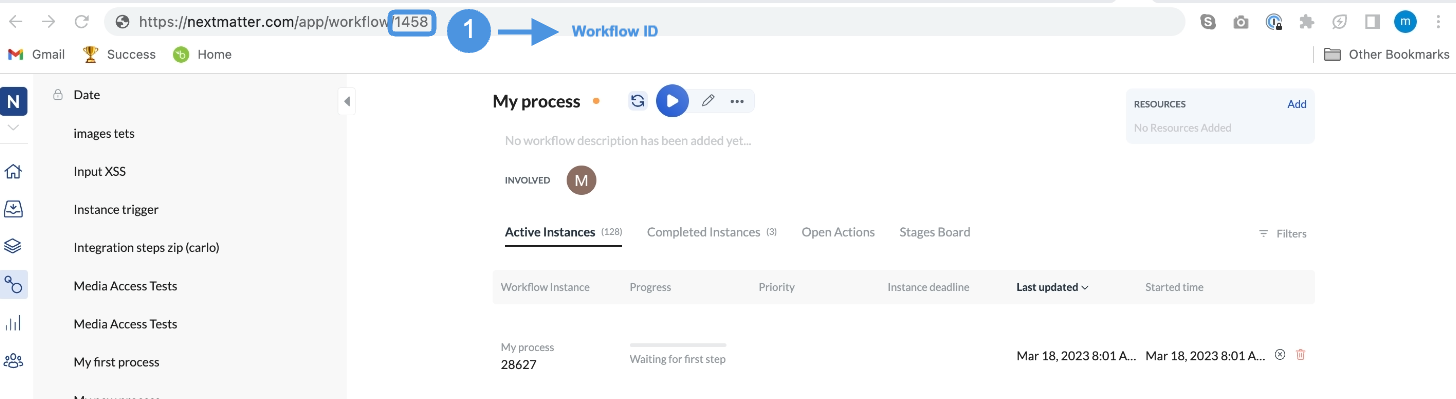
- If you want the data exported to a custom template, provide the URL replacing the placeholder in Body.
- Save your changes.
Turn PDF into JPEG
If you need to change the file format of the uploaded PDF into a JPEG file, you can use a no-code template.One step only supports converting one PDF file into a JPG. We generate one JPG file for each PDF page.
- In your workflow, click + Add step.
- Click Templates > Next Matter templates and search for PDF to image.
- Click the template to add it to the workflow.
-
Update the placeholders in the template body with your workflow ID, instance ID, step ID, and the PDF file to convert. Tip: You’ll find the data reference to the instance ID and the file reference (if it has been uploaded in any of the previous workflow steps) when you click {} in the Body field. For the file reference use the plain format.
Where is the workflow ID
You can get the ID by clicking the follow-up workflow and copying the number from the URL in your browser. - Save your changes.
Create DOCX file out of text
No need to change tools to create a downloadable document. You can provide the text inside the body of the step in your workflow, use the provided formatting options, and we’ll create the .docx file for you.- In your workflow, click + Add step.
- Click Templates > Next Matter templates and search for Create document with custom text.
- Click the template to add it to the workflow.
- Provide the text using the available formatting options such as italics or bold. The provided Document title will be used as the H1 of the document.
- (Optional) Provide the URL of a template you normally use for documents.
- Save your changes.