Before you begin
- Connect Google services in Next Matter with a service account and share data with this account. Learn more…
- Check the required scopes to learn more about which data is shared between the apps.
-
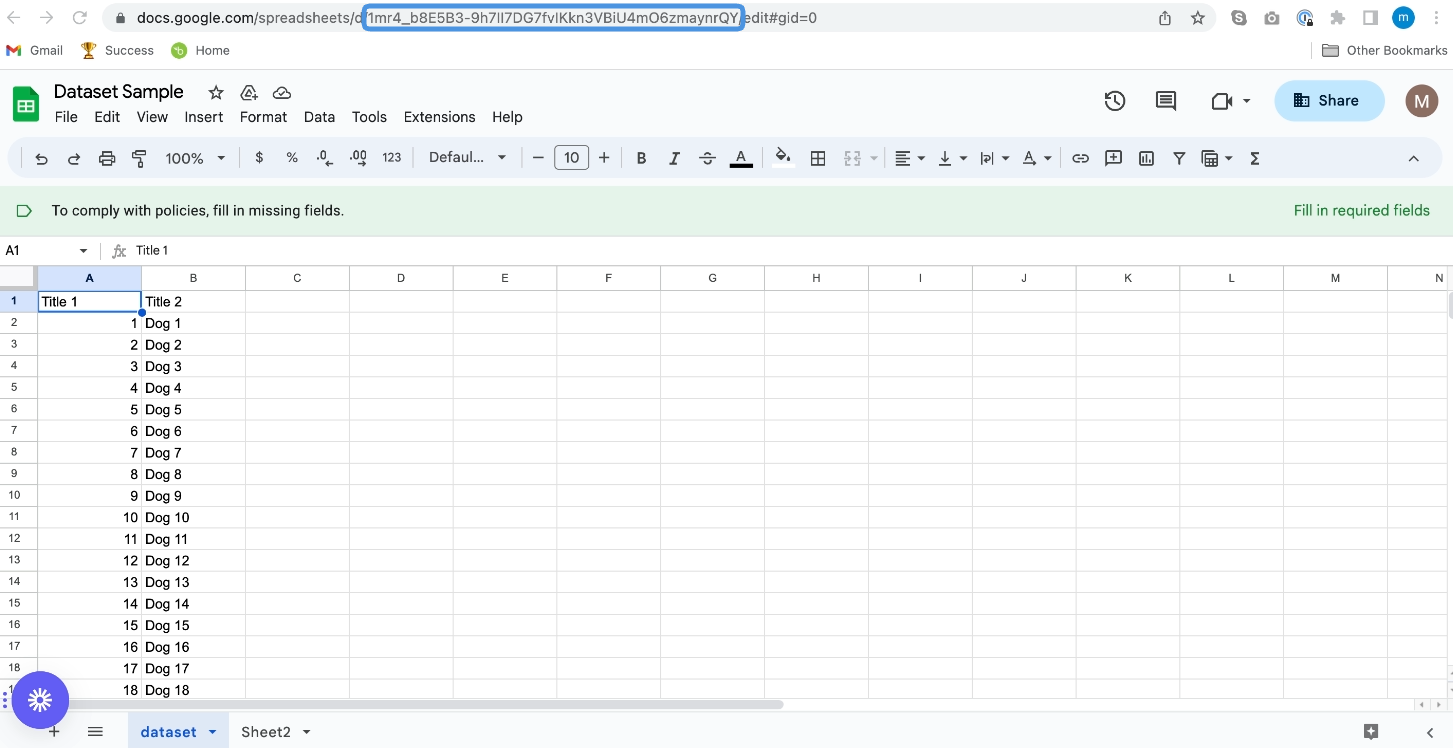
Have a Google Sheets spreadsheet ID at hand. You can find it in the spreadsheet URL.
-
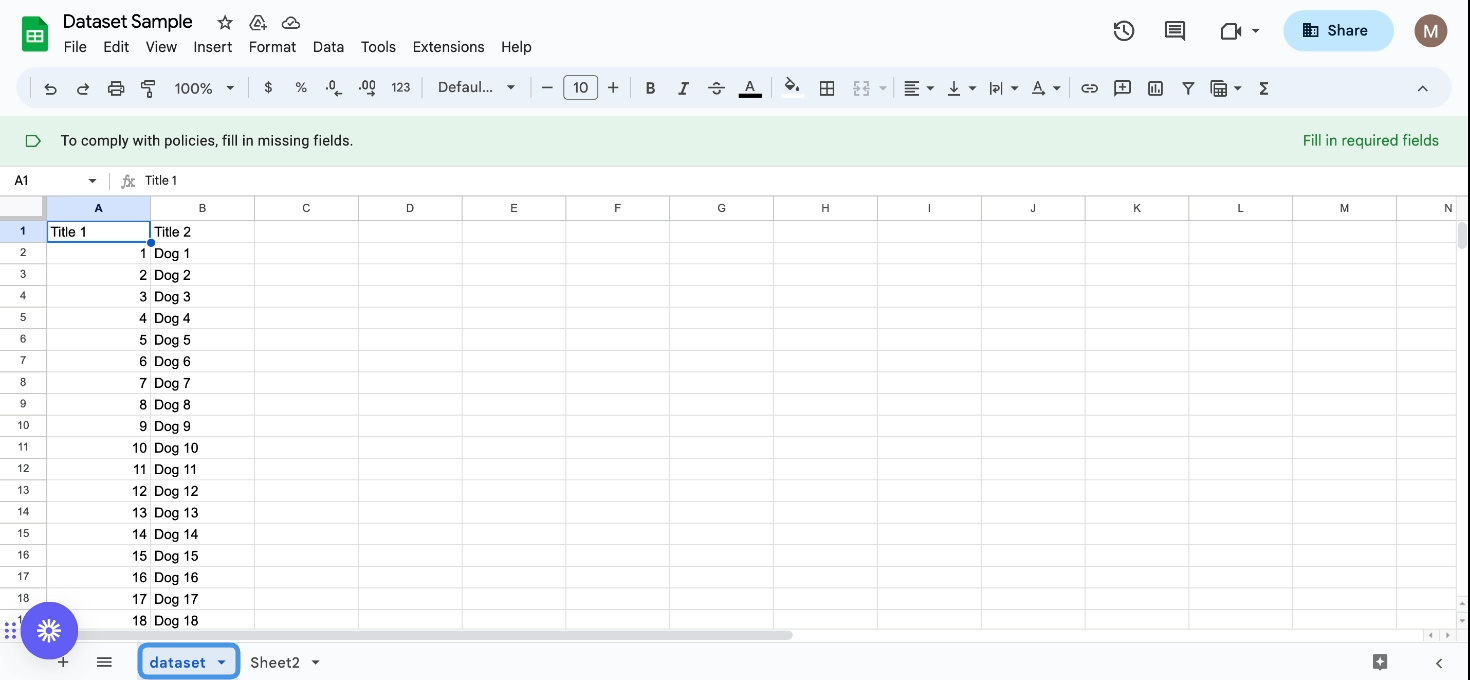
Have a sheet name of the sheet that you want to populate with data. You can find it at the bottom of your sheet.
Add a row and populate it with process data
- In your Next Matter portal, click Workflows and click the workflow from which you’ll be sending data to Google Sheets.
- Click + Add step and select Integrations > Custom integration as the step type.
- Click Settings to configure the step.
- Enter the following details:
- Method: POST
- URL:
https://sheets.googleapis.com/v4/spreadsheets/SPREADSHEET_ID/values/SHEET_NAME!CELL_RANGE:append?valueInputOption=user_entered
The range marks the first and the last cell that you want to populate. For example, if your data is supposed to be in row 2 and take up cells A, B, and C, then your range is A1:C.
- Authorization: Google Sheets
- Headers: Content-Type: application/json
-
In the Body enter the values you want to move to Google Sheets. These might be the data references of the data you collected in previous steps. For example, the body might look like the following:
- To make sure Google Sheets uses the next empty row every time a new data set is populated, click + Add variable. Create a Range variable and enter the $.ranges.updatedRange value.
Add a row and update its data
- In your Next Matter portal, click Workflows and click the workflow from which you’ll be sending data to Google Sheets.
- Click + Add step and select Integrations > Custom integration as the step type.
- Click Settings to configure the step.
-
Enter the following details:
- Method: POST
-
URL:
https://sheets.googleapis.com/v4/spreadsheets/SPREADSHEET_ID/values/SHEET_NAME!CELL_RANGE:append?valueInputOption=user_entered - Authorization: Google Sheets
- Headers: Content-Type: application/json
-
In the Body enter the values you want to move to Google Sheets. These might be the data references of the data you collected in previous steps. For example, the body might look like the following:
-
Create a variable for range with the value of
$.updates.updatedRange. - Create a step with a form with an input form field to collect the new field value.
- Create an integration step to update the value.
- As Body type values, replace the values placeholder with real values.
- Click Settings to configure the step.
-
Enter the following details:
- Method: PUT
- URL:
https://sheets.googleapis.com/v4/spreadsheets/SHEET_ID/values/RANGE_REFERENCE?valueInputOption=USER_ENTERED
ReplaceRANGE_REFERENCEwith a data reference to your integration step range variable. Click the button to select the data reference.- Authorization: Google Sheets
- Headers: Content-Type: application/json
-
Body
- Save your changes.
Find and replace data in a specific column of a sheet
- In your Next Matter portal, click Workflows and click the workflow from which you’ll be sending data to in Google Sheets.
- Click + Add step and select Integrations > Custom integration as the step type.
- Click Settings to configure the step.
-
Enter the following details:
The range marks the first and the last cell that you want to populate. For example, if your data is supposted to be in row 2 and take up cells A, B, and C, then your range is A1:C.
- Authorization: Google Sheets
- Headers: Content-Type: application/json
-
In the Body enter the values you want to move to Google Sheets. These might be the data references of the data you collected in previous steps. For example, the body might look like the following:
- Method: POST
-
URL:
https://sheets.googleapis.com/v4/spreadsheets/SPREADSHEET_ID/:batchUpdate
Identify a piece of information in Google Sheets and display it in the process
To do so, you’ll be using the Vlookup function.- In your Next Matter portal, click Workflows and click the workflow from which you’ll be sending data to Google Sheets.
- Click + Add step and select Integrations > Custom integration as the step type.
- Click Settings to configure the step.
-
Enter the following details:
For example, the body might look like the following:The range marks the first and the last cell that you want to work with. For example, if the data is in row 2 and take up cells A, B, and C, then your range is A1:C.
- Authorization: Google Sheets
- Headers: Content-Type: application/json
- In the Body enter the values you want to look for in Google Sheets. If you need more insights into how the function works, see Google documentation. If you want to find a number field and not a text field, remove the
\from around the \SEARCH_KEY. - Method: PUT
- URL:
https://sheets.googleapis.com/v4/spreadsheets/SPREADSHEET_ID/values/SHEET_NAME!RANGE?valueInputOption=user_entered&includeValuesInResponse=true
- Save your changes.
- Create a step with a form that has an Instruction form field and use the data reference to display the found data in the instruction.
Create a dynamic dropdown from a sheet
As part of the workflow, you can create a single or multi-value dropdown from a data source. When the source is updated, so is the dropdown that displays. The values are supported when they are a 2D array where the first item in each record is the key and the second item in each record is what the workflow user should see (value).- Click + Add step and select Integrations > Custom integration as the step type.
- Click Settings to configure the step.
-
Enter the following details:
We support long data sets however show only the first 250 items. The remaining ones are displayed as search results.
- Authorization: Google Sheets
- Headers: Content-Type: application/json
- Method: GET
- URL:
https://sheets.googleapis.com/v4/spreadsheets/SPREADSHEET_ID/values/SHEET_NAME!RANGE/Make sure to change the dataset values to your own.
-
Create a variable for the dataset result with the value of:
$.values.[*].If the source is a list, the variable is$.values. - Save your changes.
- Create a form step with the single-value dropdown as a form field. Click Settings to configure the step.
- Select the Dynamic from external data source option as Source of Items.
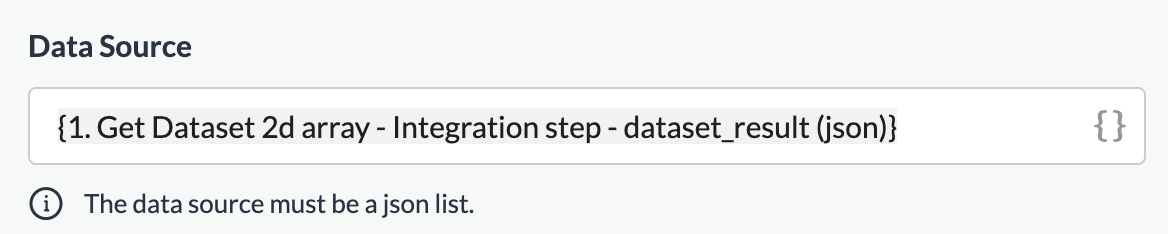
-
In the Data Source, click to select the data reference. This should be the variable from the previous step. For example, it might look the following:
- Save your changes.
We support 1D or 2D arrays at the moment. It can either be: [“test”, “test2”] or [[“1”, “test”], [“2”, “test2”]] where “1” and “2” are treated as the actual submitted values and “test” and “test2” would be the display values.
Use Vlookup
Use VLOOKUP to find things in a table or a range by row. For example, look up a price of an automotive part by the part number, or find an employee name based on their employee ID.- In your Next Matter workflow, click +Add step and select Integration > Custom integration.
- Click Settings to configure the step.
- Enter the following details:Tip: For more on the Vlookup values, see W3 (external link)
- Method: PUT
- URL: https://sheets.googleapis.com/v4/spreadsheets/SPREADSHEET_ID/values/SHEET_NAME\\\!RANGE?valueInputOption=USER_ENTERED&includeValuesInResponse=true Note: Provide the range in the format of A1:A1 (it defines the cell or cells containing VLOOKUP formula)
- Authorization: Google Sheets
- Content-Type: application/json
-
In the Body enter the values you want to add in the table row.
- Add a variable for the Vlookup result with the value of
$.updatedData.values[0][0] - Save your changes.
Add a sheet to an existing spreadsheet
To do so, you’ll need thespreadsheet_ID of the spreadsheet you’ll be using.
See how to get the ID…
- In your Next Matter portal, click Workflows and click the workflow from which you’ll be creating a new sheet in Google Sheets.
- Click + Add step and select Integrations > Custom integration as the step type.
- Click Settings to configure the step.
- Enter the following details:
- Method: POST
-
URL:
https://sheets.googleapis.com/v4/spreadsheets/SPREADSHEET_ID:batchUpdate - Authorization: Google Sheets
- Headers: Content-Type: application/json
-
In the Body enter the following:
- Create a variable to use the newly created ID of the sheet in the next steps. Create the sheet ID variable with the value of
$.replies[0].addSheet.properties.sheetId. - Save your changes.
Delete a sheet from an existing spreadsheet
To do so, you’ll need thespreadsheet_ID of the spreadsheet you’ll be using. See how to get the ID…
- In your Next Matter portal, click Workflows and click the workflow from which you’ll be deleting a sheet from Google Sheets.
- Click + Add step and select Integrations > Custom integration as the step type.
- Click Settings to configure the step. 4