Not sure how to configure a form? Learn more…
Dynamic tables
Dynamic tables have an external data source (in CSV or JSON) and can change as the source changes. To create a dynamic table:- Select the Table form field.
- Click to configure the table and select Dynamically create table from external data source. You can either use a data reference to link to the source and make the content dynamic or manually enter the table content.
See how to edit table values
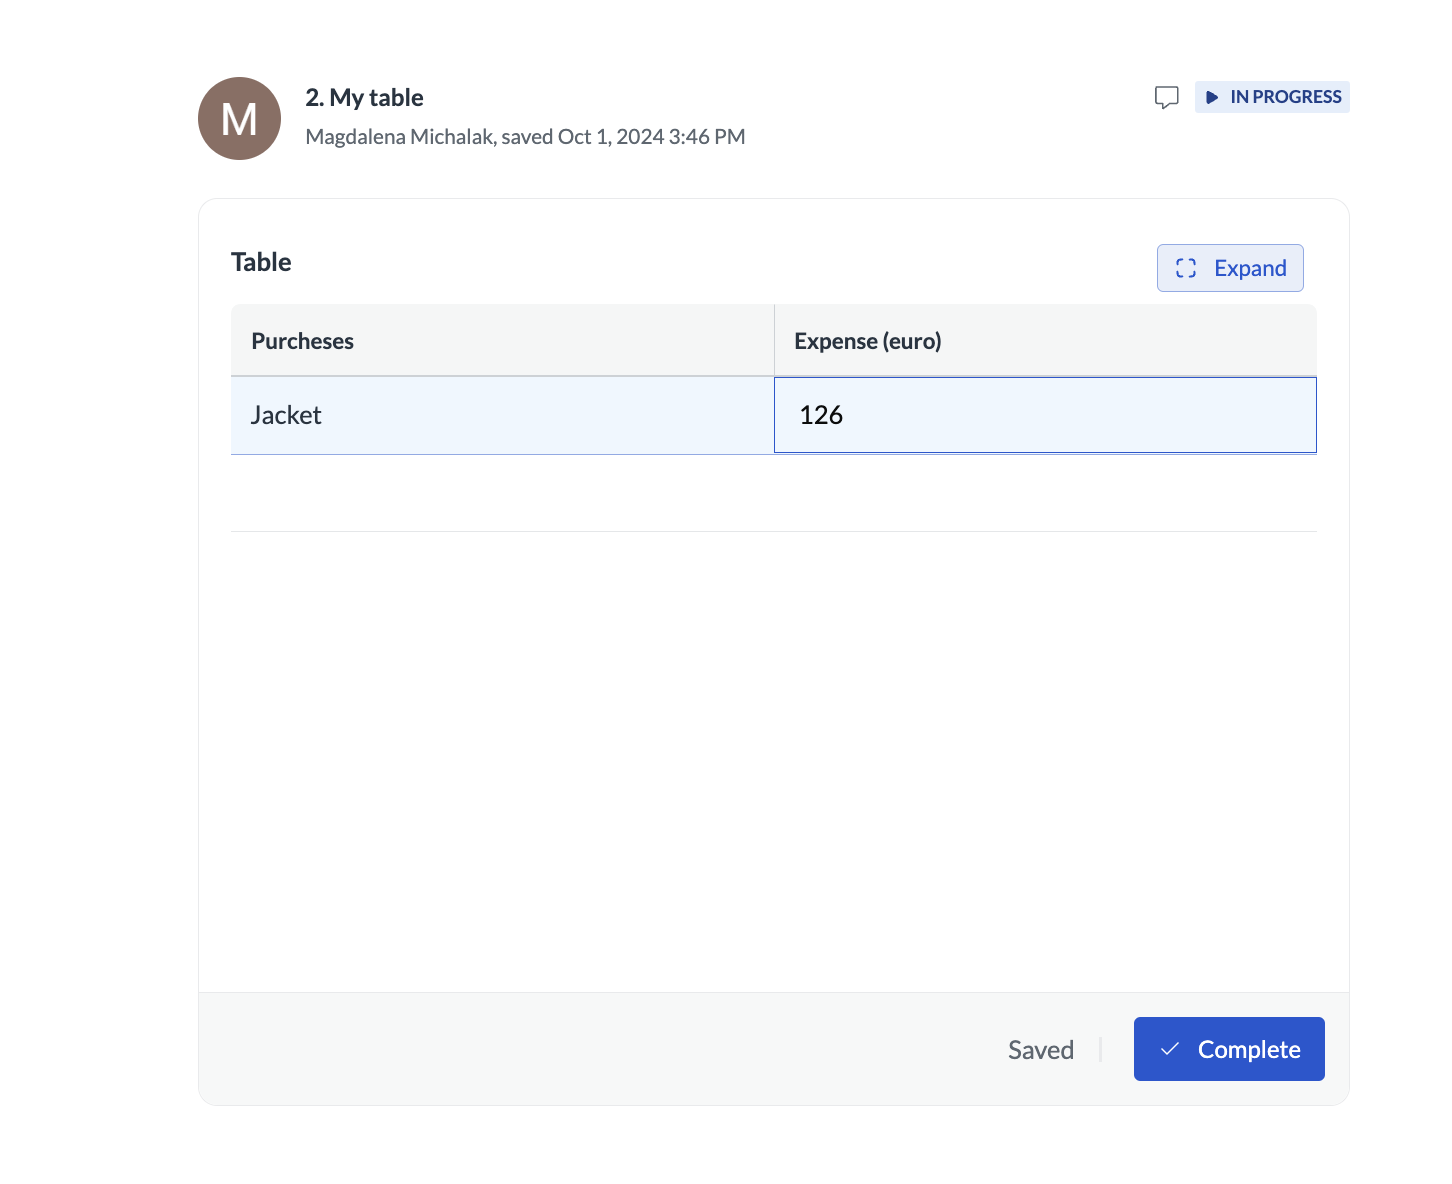
See how to edit table values
- Click the value in the table.
- Update the value and hit Enter.
Predefined tables with validation
You can predefine tables for users or add input validation based on the content type you select for each column.- Select the Table form field.
- When you configure the table the table, select Predefine table.
- In the Headers section add the names of header columns and (optionally) select the type of input for each column. For example, if you choose Text as the Allowed content type, users won’t be able to add any numbers when editing the column in a running workflow instance.
If you add a file as an external source of data for the table and the data in the file won’t match the selected Allowed content type, this data will be ignored and will not show in the table. Additionally, make sure sure the number of columns you name corresponds with the number of columns in the source. If there are extra columns in the source, they will be ignored.
- (Optional) To validate user input against a regular expression, enter the Regex pattern. If what the user provides doesn’t match the pattern, an error will be displayed.
- (Optional) If user input is required for a specific column, flip the toggle on to make the column mandatory. This way, the user won’t be able to complete the step without entering the content in the table cell.
- (Optional) Select or enter the data source. If you want the table to be empty, leave the field blank. However, make sure to select Users can add and remove rows in the Table layout and content so that users can add rows to the empty table. If you want to enter the content manually, follow the structure below. Note that you define headers separately in the Column headers and validation section.
Prefilling date values
Prefilling date values
You can use the JSON format to prefill dates.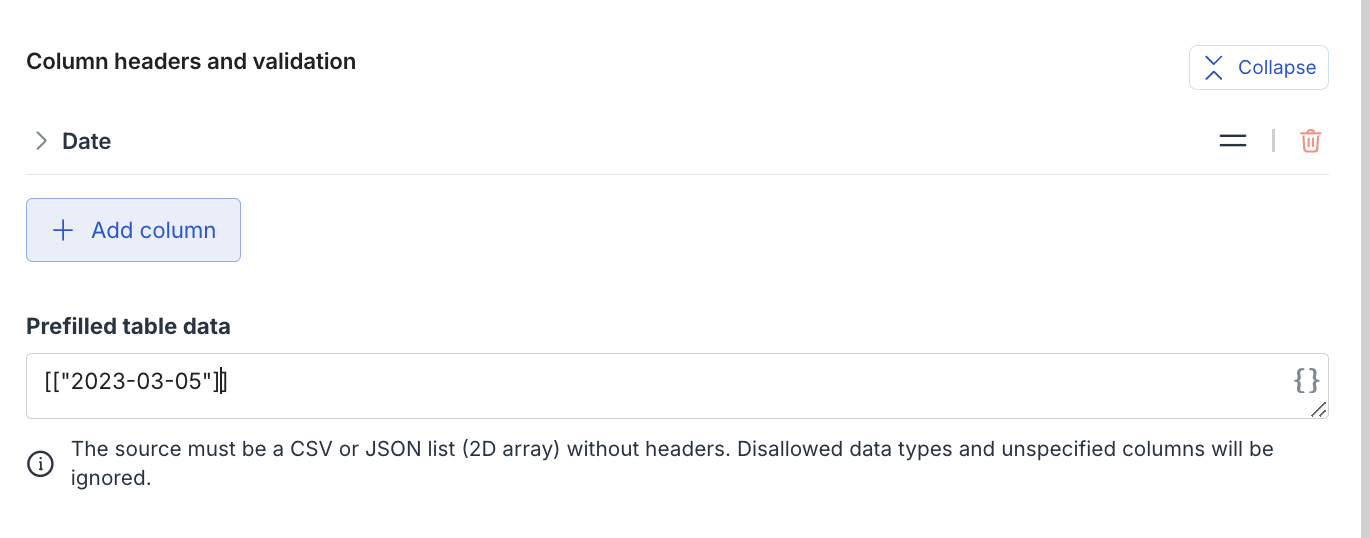
"", for example:- “2025-12-01”
- “2025-12-01T00:00:00”
- “2025-12-01 00:00:00”
- “2025-12-01T00:00:00Z”
- “2025-12-01T00:00:00.000000”
Using one table as data source for another
You can use one table as a source data reference for another table. This is especially helpful when a table filled out in one step needs to be reviewed or reused in another.- Supported scenario: The source and target tables must be of the same type. For example, a filled-in dynamic table can serve as a data source for another dynamic table.
- Unsupported scenario: If the table types differ, the data will not display correctly. For instance, a predefined table cannot be a source for a dynamic table, and vice versa. This limitation exists because the headers are defined differently for each table type.
Read-only tables
You can make dynamic and predefined tables read-only by enabling the Make table read-only toggle. This option is useful in steps when users need to review or approve table data without editing it. Note that when tables are read-only, users can’t add rows or edit table cells so make sure the table that displays already contains data and is not empty.Add tooltip to field
You can add extra information to help users provide the right input. The information will show when users hover over the info icon next to the field name.