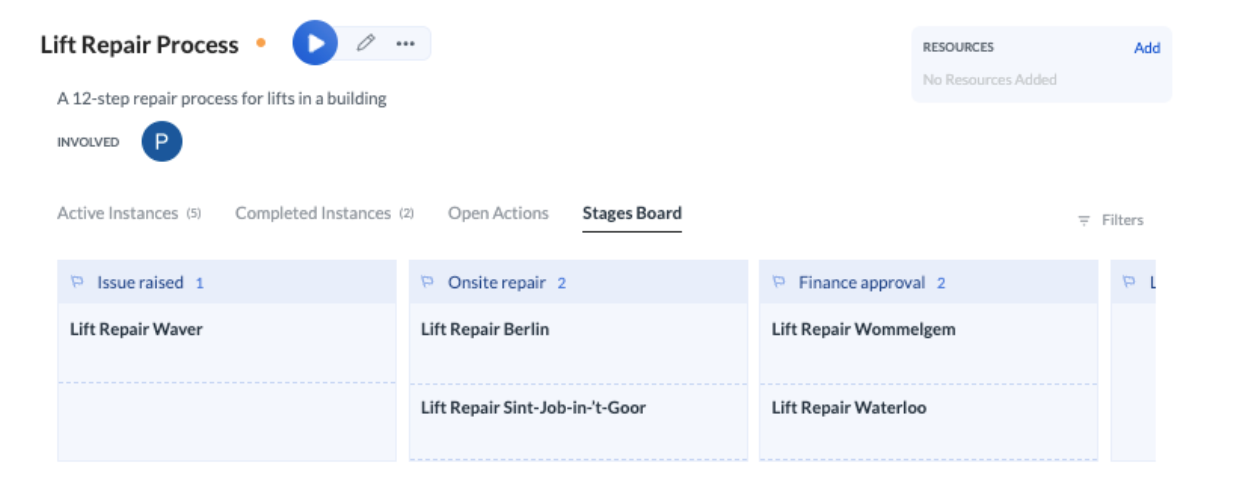
If you have the board configured, you can see it in the workflow overview. The data on the board is updated in real-time, and you don’t have to move items between columns.
If you added stages to the workflow after some instances of the workflow have been started, these instances will show in the No stage column of the board. When these instances are completed, the No stage column will disappear.
Additionally, if there are steps that take place before your first stage begins, the new instances of a workflow will also appear in the No stage column and remain there until the first stage is reached.
Set up the board
On the stages board, stages are ordered by creation time (the order in which they are added to the workflow). Note that you can set stages on top-level steps, not on nested steps.
- Click a workflow to open it.
- Find the step you want to be the first stage in the workflow and click the step to open it.
- Click Add a stage.
- Enter the name of the stage.
- Click Add stage.
A flag will be displayed next to the step to mark where the stage starts. The workflow will remain in this stage even after this step has been completed. It will move to the next stage when the next step with an added stage is reached.
Setting stages for workflows is important when you allow external users to track the progress of instances they’ve created. Stages offer insights into their requests and provide them with the data they need to stay informed. You can toggle on tracing instances when you create a public form in your workflow.
How stages are displayed on Stages Board
Stages are displayed on the stages board in the order they are added to the workflow.
Example: If you add a stage to Step 3 in your workflow, that stage will appear on your Stages Board when an instance reaches Step 3. Later, if you edit the workflow, add a stage to Step 1, and run another instance, the stage for Step 1 will appear after the stage for Step 3. This happens because the stage for Step 1 was created after the stage for Step 3, even though it’s earlier in the workflow.
To ensure a logical order on the Stages Board, add stages only after your workflow is fully built, starting with the earliest stages first.
- If stages are added after some instances have already started, those instances will be shown in the No stage column of the Stages Board.
- If the first instance step with a stage has a scheduled start, the step will be in the No stage column until the step is activated when its scheduled date arrives.
- Stages are identified by the name at the moment of creation, which means that renaming a stage (or fixing a typo) creates a new one.
- Stages can’t be versioned.
Update stages
Adding a new stage
You can add a new stage to the workflow at any time. The new stage column will immediately appear on the Stages Board however, it will only be used by the instances started after the new stage was added.
Changing the stage name
The change will temporarily create a new column. The column with the old name will be on the board it is empty.
Moving a stage
When you move a step with a stage, the order of the columns on the board will automatically be updated. You might have to reload the board.
Deleting a stage
The deleted stage will disappear from the board when it is empty. Until then it will be displayed to the very right of the board.
Triggering a stage
An instance enters a stage when a step is activated that has that stage assigned to it. It keeps the stage even when the subsequently activated steps have no stage assigned.