> ## Documentation Index
> Fetch the complete documentation index at: https://help.nextmatter.com/llms.txt
> Use this file to discover all available pages before exploring further.
# Use cases: forms, actions
> See how you can use workflows and workflow solutions to respond to specific business scenarios.
Design Workflows
Builder Toolbox
To validate if a date is in the future, use the [compare quick action](/docs/calculations#comparing-formulas) in Next Matter.
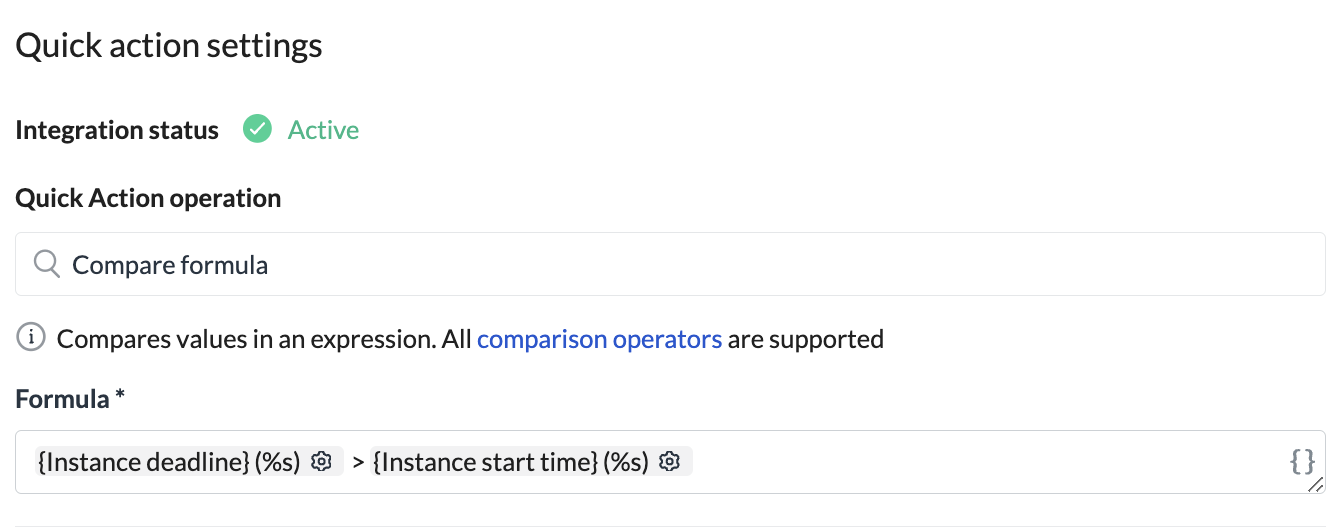 To compare the dates, you need to format them into UNIX timestamps. To do that, select the cog wheel next to the date and enter %s in the **Custom format** field.
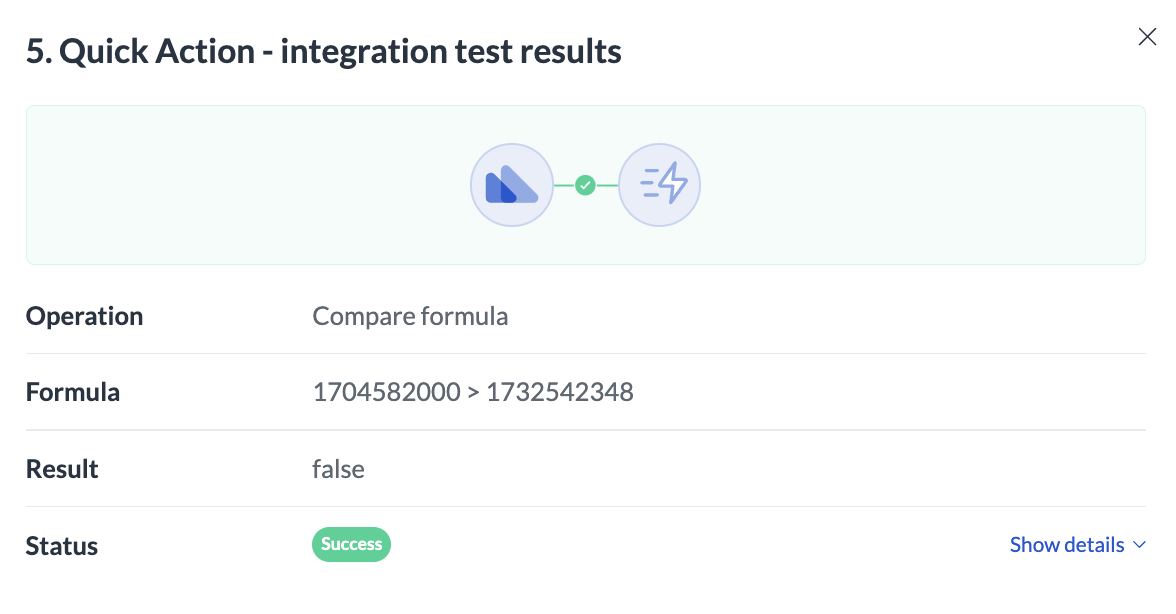
If you want to skip data references and enter a date yourself, use [this converter](https://www.epochconverter.com/) (external page) to create a UNIX timestamp that you'll enter into the **Formula** field in Next Matter. For example, comparing this date `01/07/2024` will look like this after the date has been converted:
To compare the dates, you need to format them into UNIX timestamps. To do that, select the cog wheel next to the date and enter %s in the **Custom format** field.
If you want to skip data references and enter a date yourself, use [this converter](https://www.epochconverter.com/) (external page) to create a UNIX timestamp that you'll enter into the **Formula** field in Next Matter. For example, comparing this date `01/07/2024` will look like this after the date has been converted:
 Assuming the instance start time is in November 2024, we're getting the correct `False` step result.
 Some customers must delete customer or other sensitive data after a set amount of time (for example 30 days). You can easily meet this compliance expectation by adding a non-blocking step at the workflow's start and having it start 30 days after the instance starting time.
This solution will automatically delete the instance together with all the media or files it might contain at the set time.
The instance will be deleted at the set time even if the instance hasn't been completed.
To build a reimbursement form, when users input several entries you can use either:
* A table
* Short text forms with conditions
**Use a table**
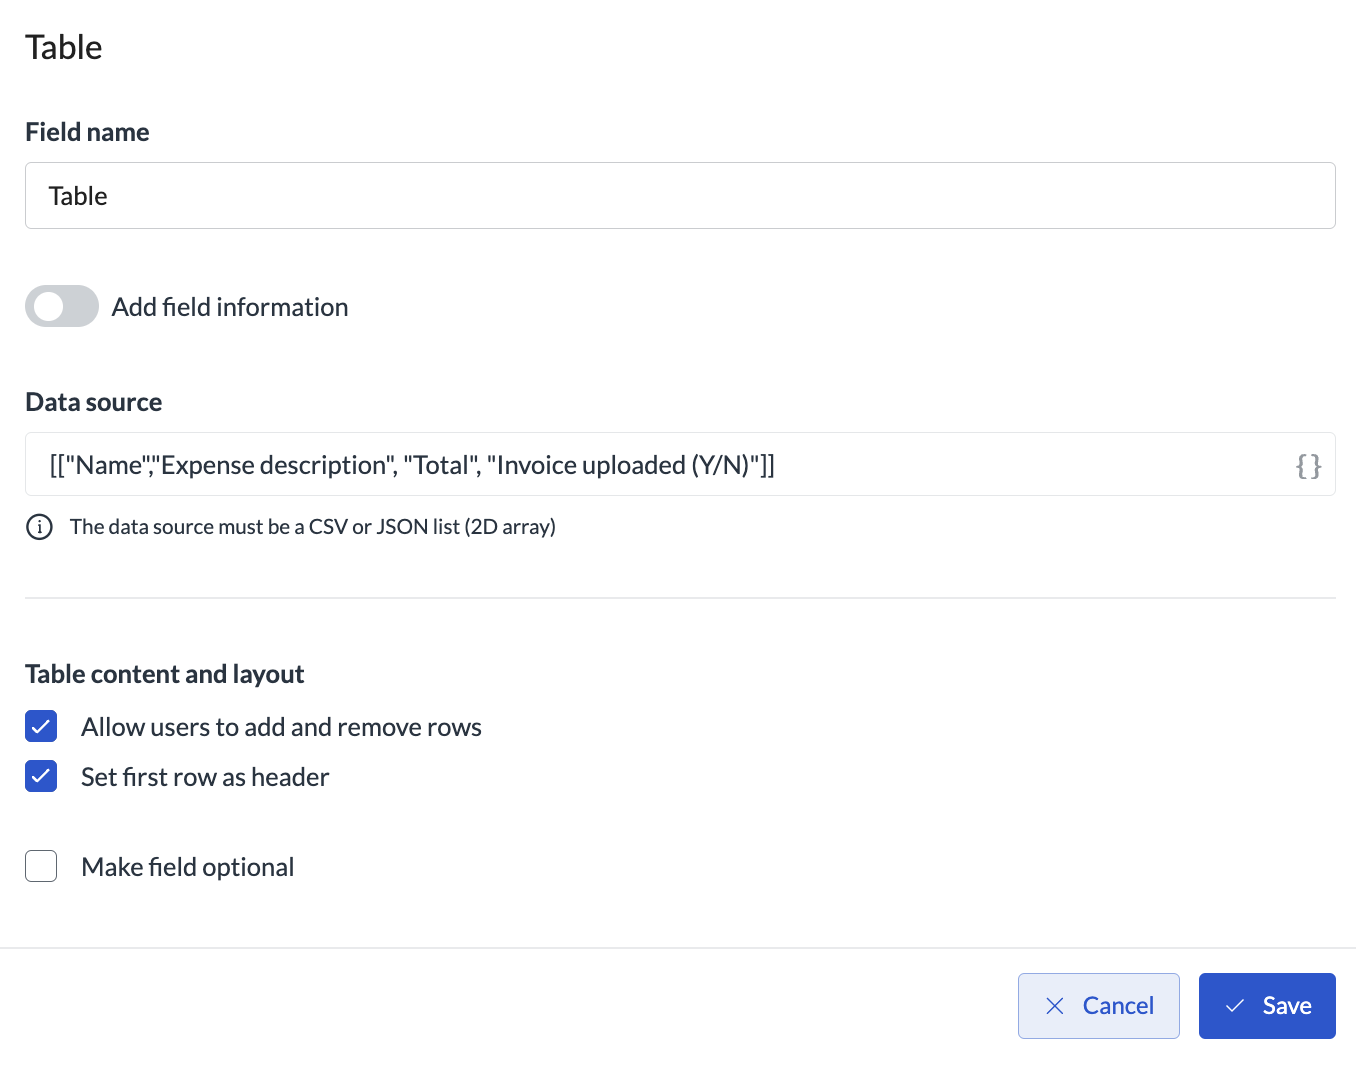
1. In your workflow, add **Form** as a step and add **Table** as a new form field.
2. Configure the table headers to display the information for the reimbursement. The data can either come from an external source or be a 2D array.
3. Select the option that enables users to add rows.
Some customers must delete customer or other sensitive data after a set amount of time (for example 30 days). You can easily meet this compliance expectation by adding a non-blocking step at the workflow's start and having it start 30 days after the instance starting time.
This solution will automatically delete the instance together with all the media or files it might contain at the set time.
The instance will be deleted at the set time even if the instance hasn't been completed.
To build a reimbursement form, when users input several entries you can use either:
* A table
* Short text forms with conditions
**Use a table**
1. In your workflow, add **Form** as a step and add **Table** as a new form field.
2. Configure the table headers to display the information for the reimbursement. The data can either come from an external source or be a 2D array.
3. Select the option that enables users to add rows.
 4. Add the **Image upload** form field if you want users to upload images.
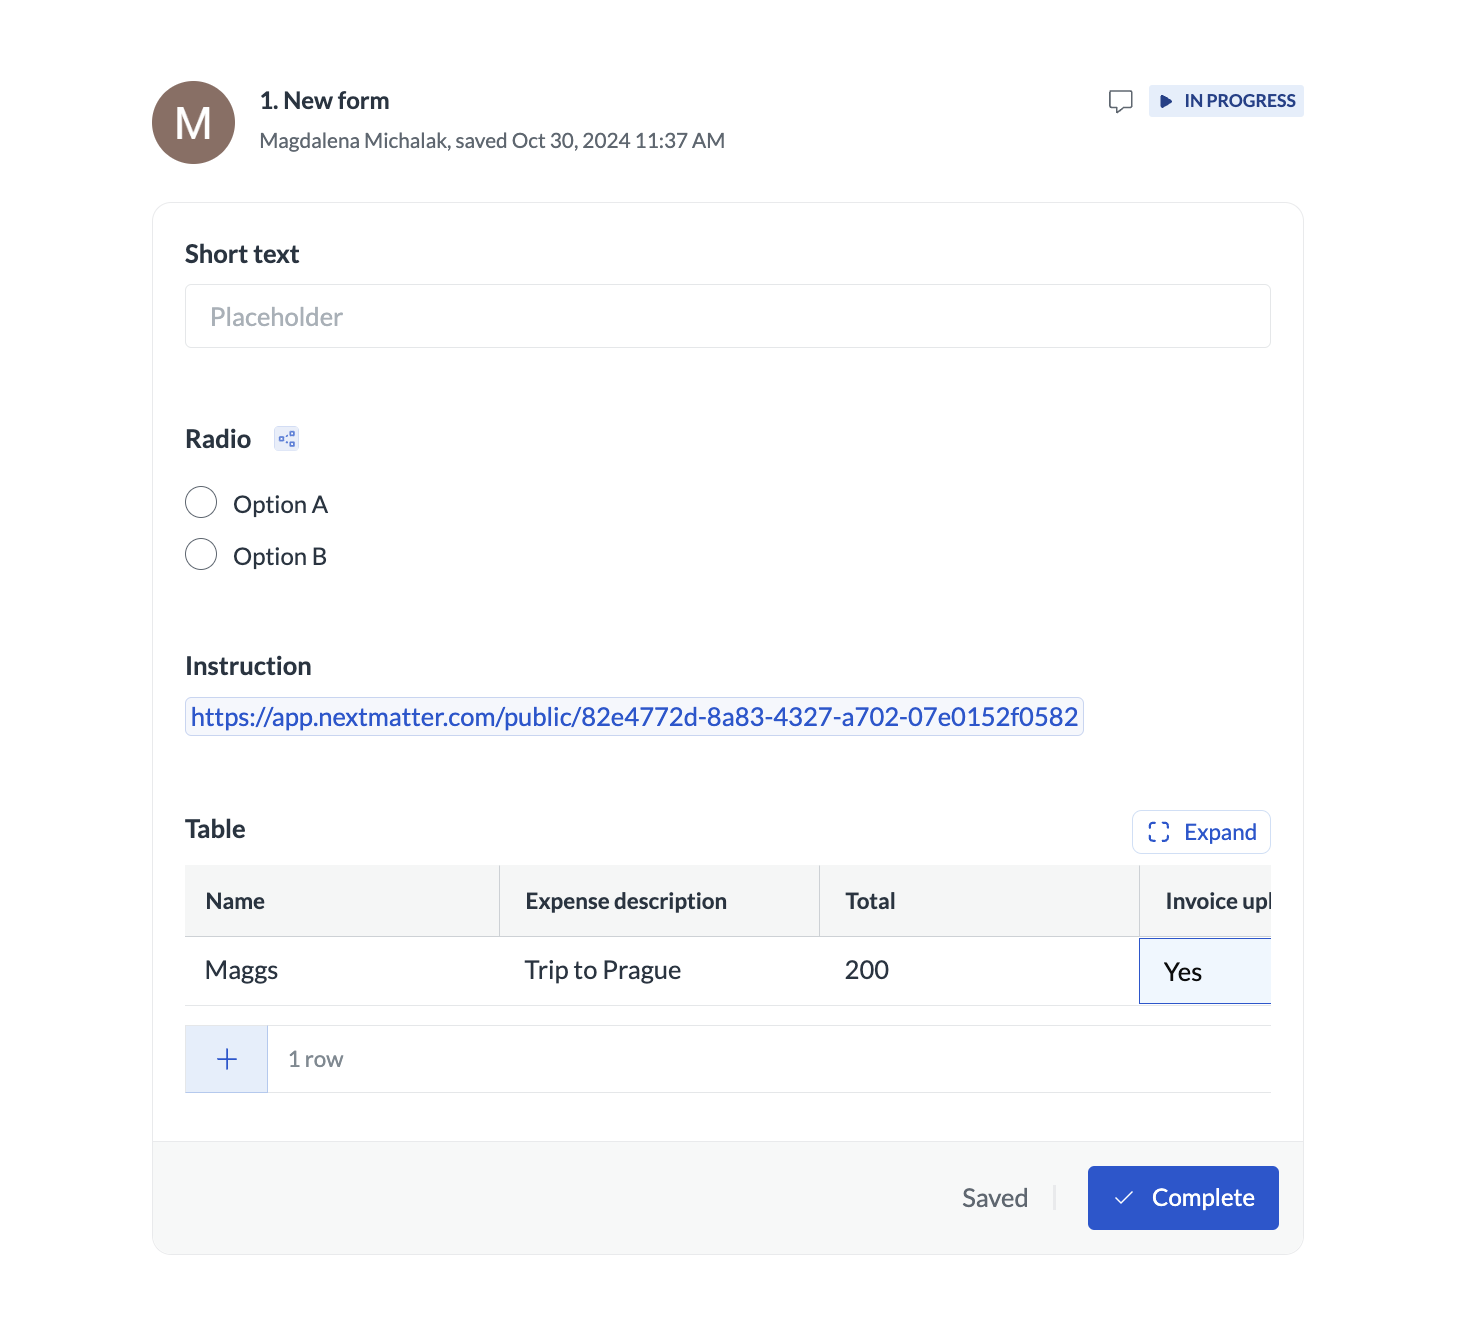
Your table will look like the following and the users will be able to add rows and fill in the content.
4. Add the **Image upload** form field if you want users to upload images.
Your table will look like the following and the users will be able to add rows and fill in the content.
 **Use conditional fields**
1. In your workflow, add **Form** as a new step and add several **Short text** fields. You can configure the fields to require reimbursement details.
**Use conditional fields**
1. In your workflow, add **Form** as a new step and add several **Short text** fields. You can configure the fields to require reimbursement details.
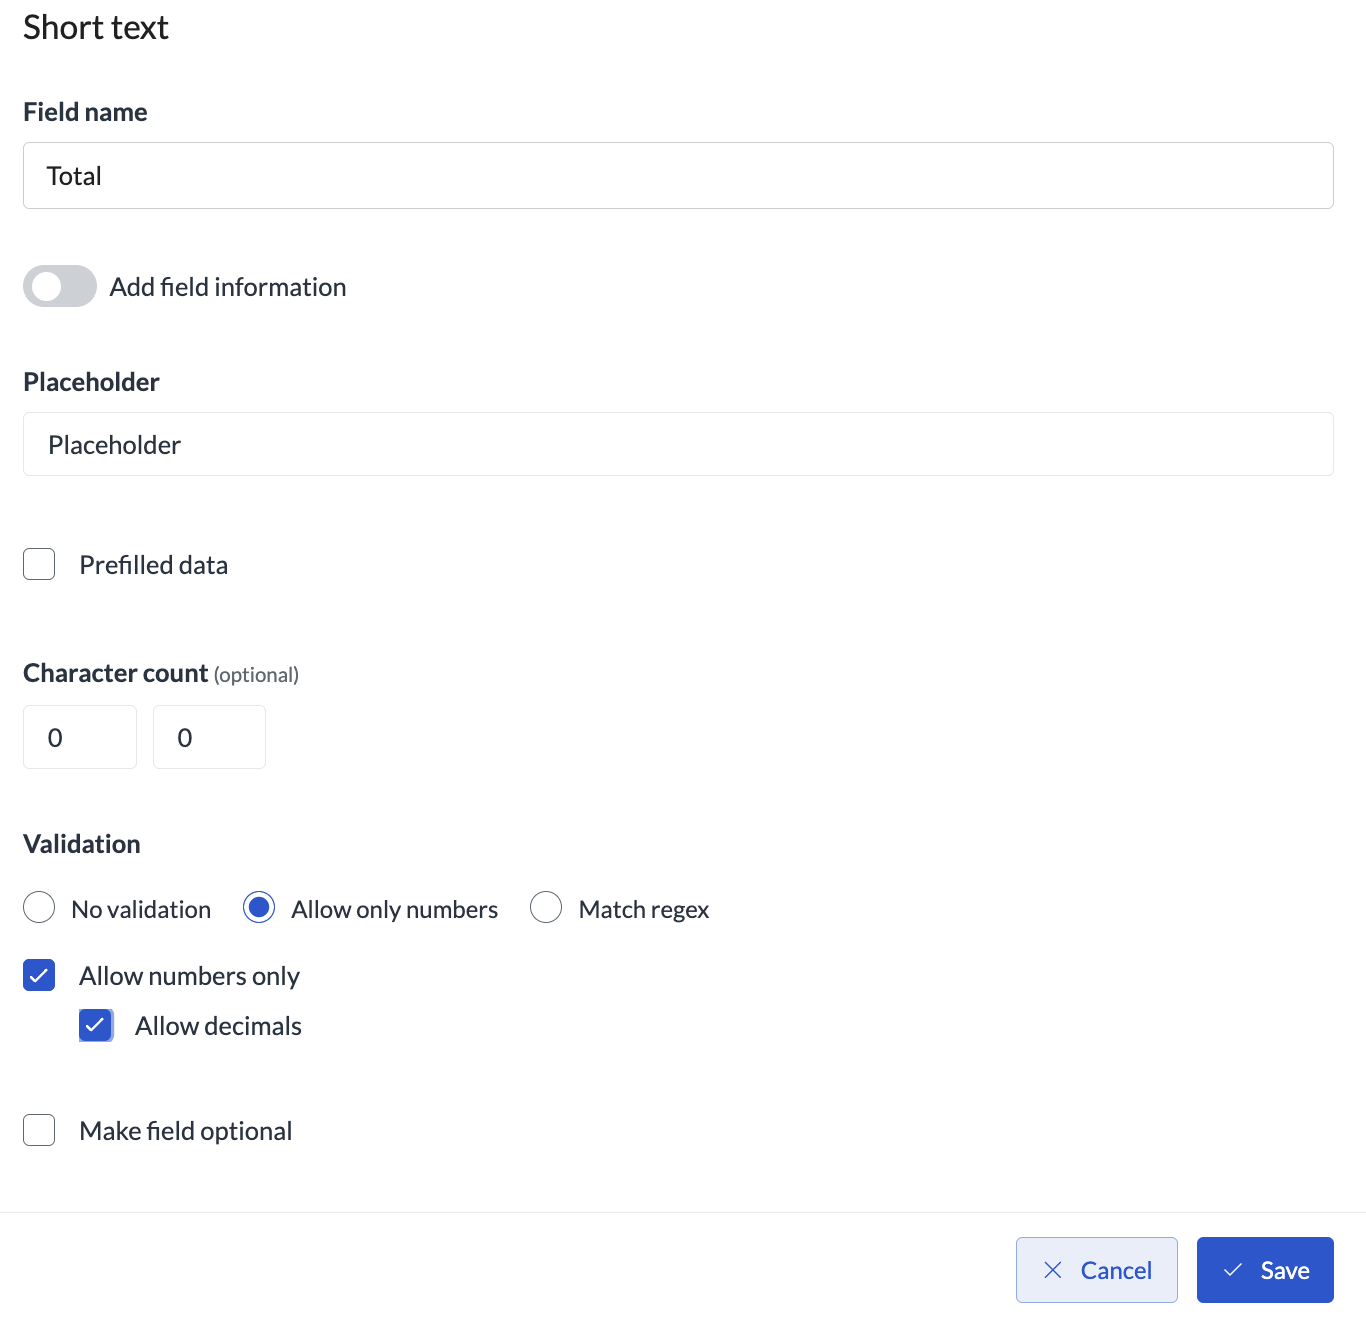
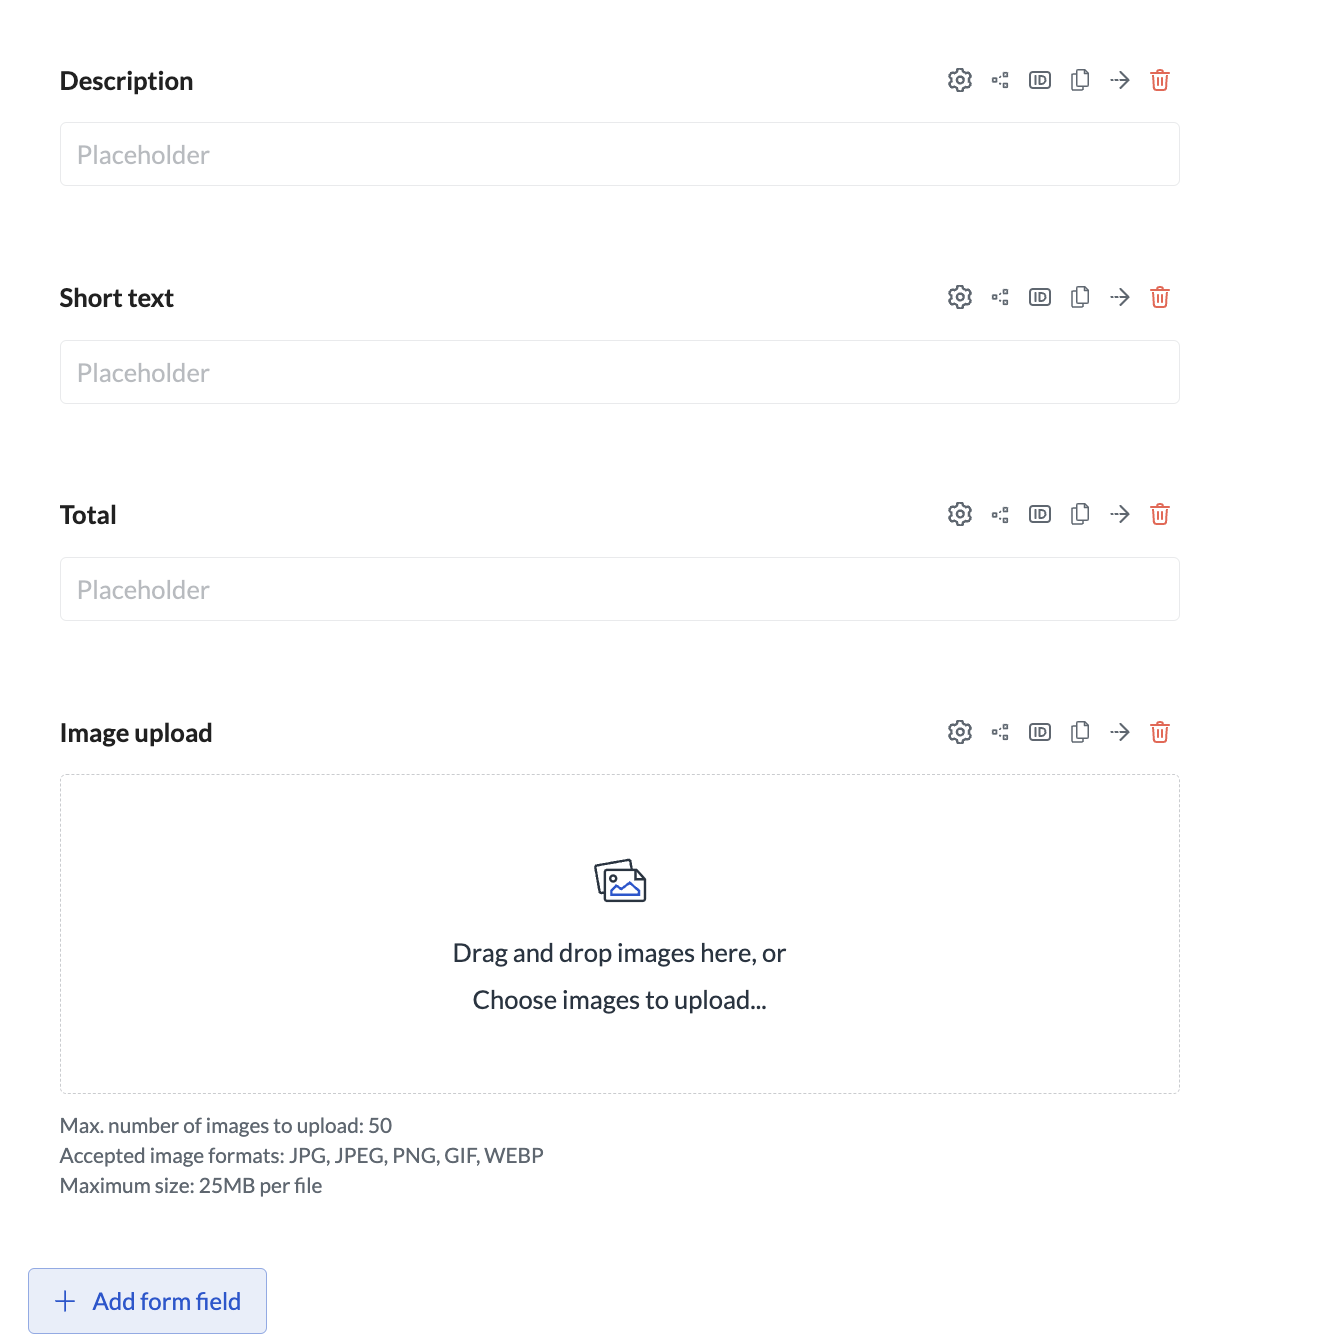 2. For the field where the sum is provided, make sure to add the **Allow only numbers** validation and allow decimals.
 3. Add the **Image upload** field so that users can upload their invoice pics.
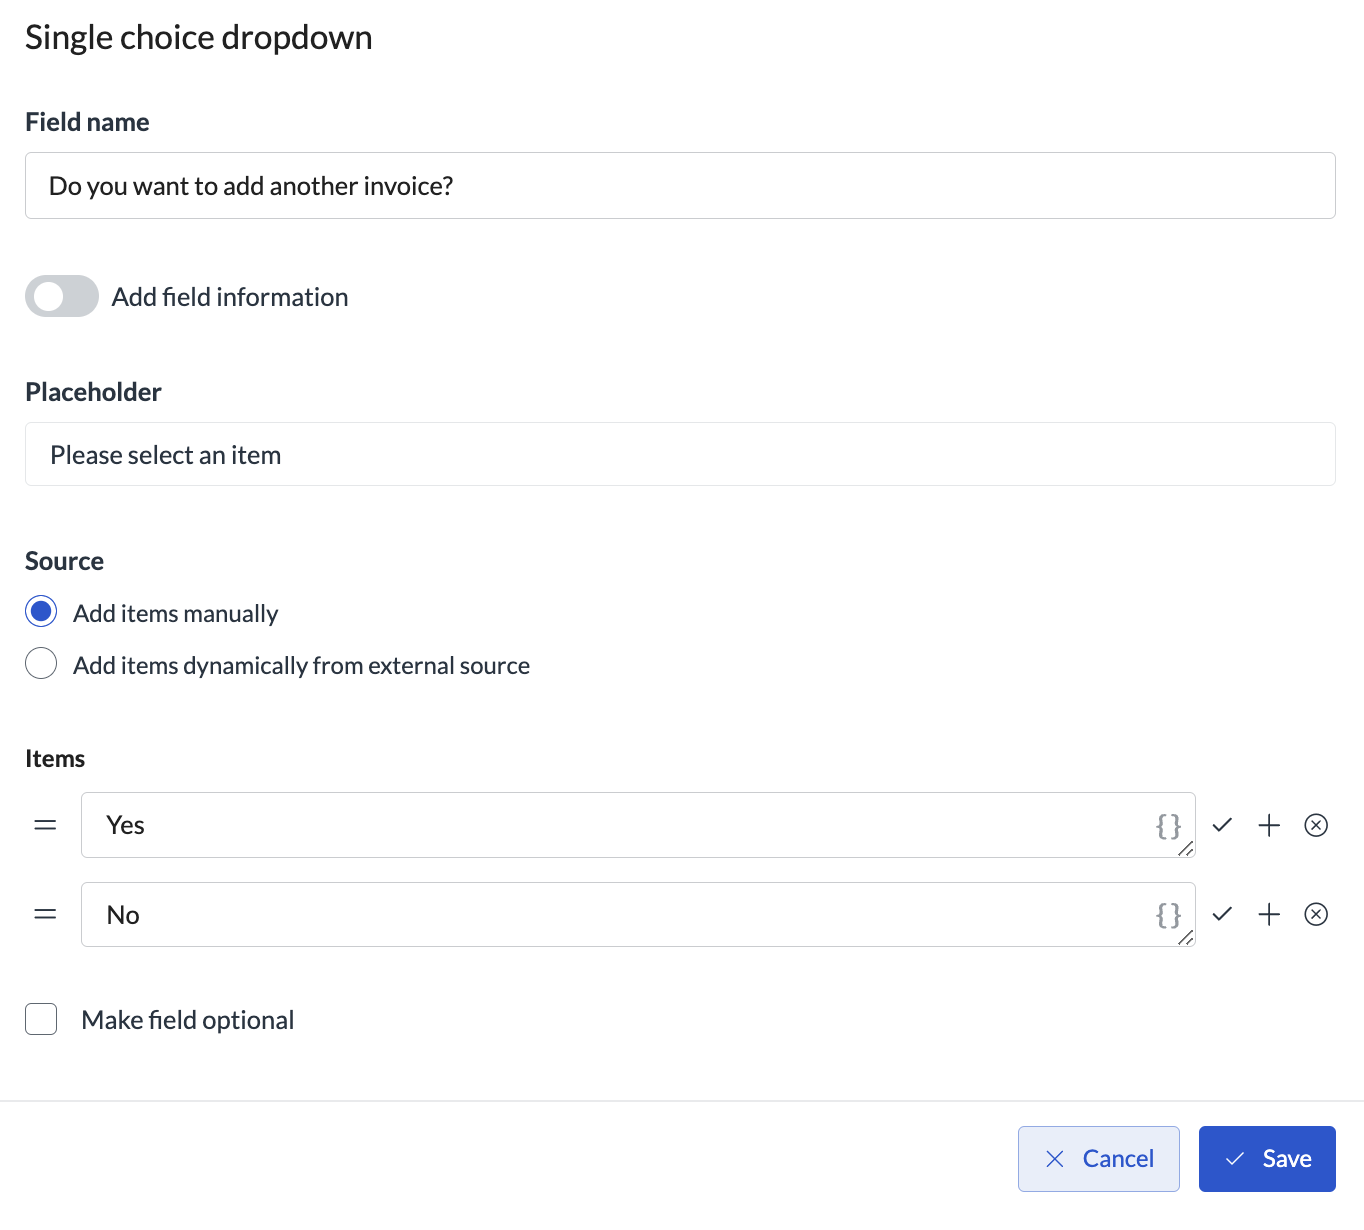
4. Add the single choice dropdown field to ask users if they want to add more invoices.
3. Add the **Image upload** field so that users can upload their invoice pics.
4. Add the single choice dropdown field to ask users if they want to add more invoices.
 5. Duplicate the reimbursement form fields and create conditions on each of the fields to only show if the user selects to add more invoices.
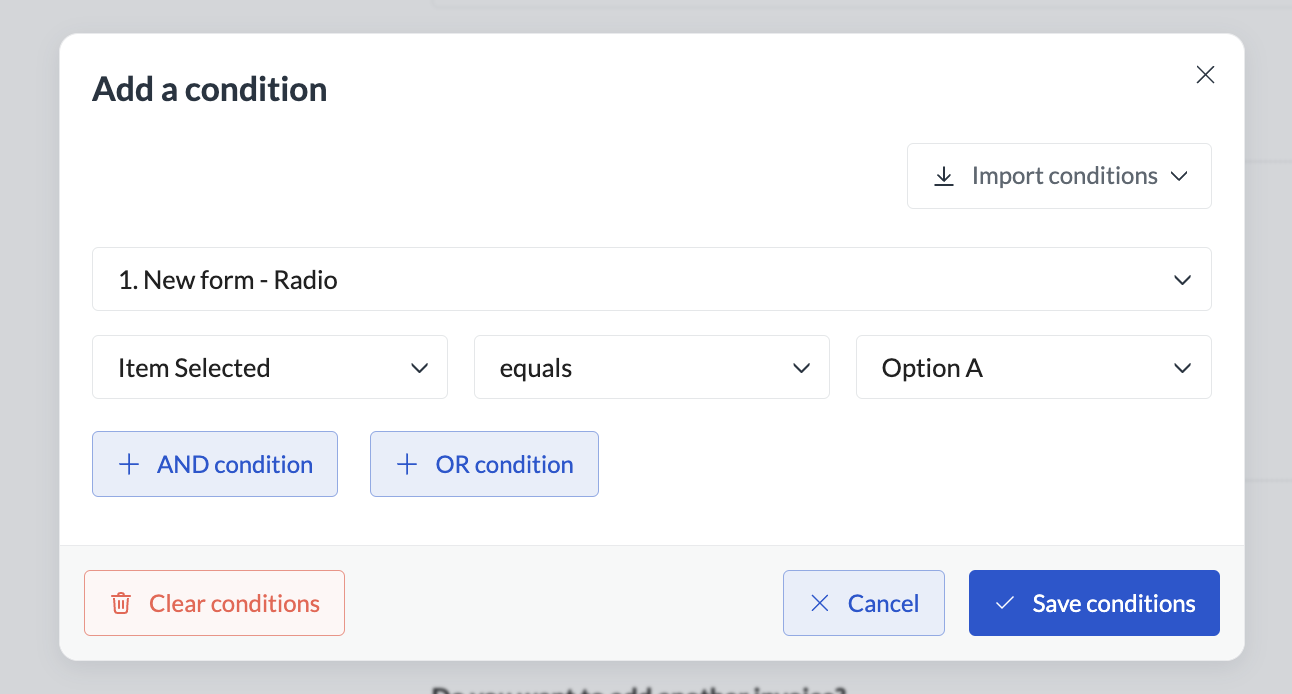 Normally the file upload form field allows you to upload a maximum of 50 files (and 50 MB per file). If you require to upload more, you can create multiple upload fields and show them based on conditions. Watch the video for details.