> ## Documentation Index
> Fetch the complete documentation index at: https://help.nextmatter.com/llms.txt
> Use this file to discover all available pages before exploring further.
# Follow-up workflows
> When you need one workflow to automatically start another one, you can set a trigger on the first workflow to initiate the next one.
## Before you begin
* Create the first and the follow-up workflow. The first workflow will trigger the next workflow.
* Have your **API key** at hand. If you don't have it, contact your organization admin, or, if you're an admin, generate the key in Next Matter by going to **Company > Next Matter API keys**.
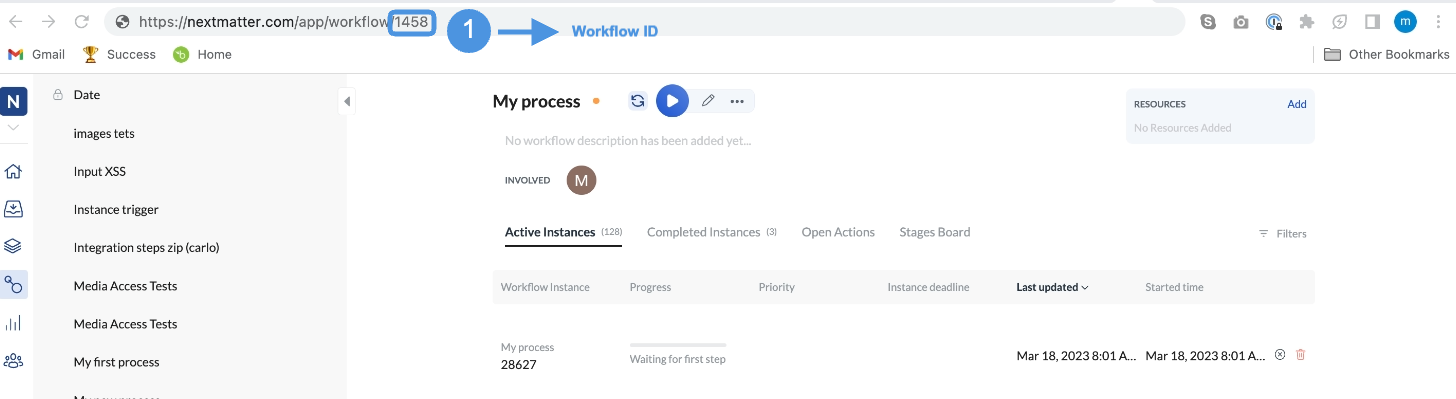
* Note down the ID of the workflow that will be triggered with the first workflow. You can get the ID by clicking the follow-up workflow and copying the number from the URL in your browser.
 ## Workflow overview
1. Add a template to your first workflow.
2. Edit the template settings for the trigger to work.
3. Start the workflow instance.
### 1. Add a template to your first workflow
1. In your left-hand navigation, click the **Workflow** icon.
2. Hover over the first workflow and click on the menu icon.
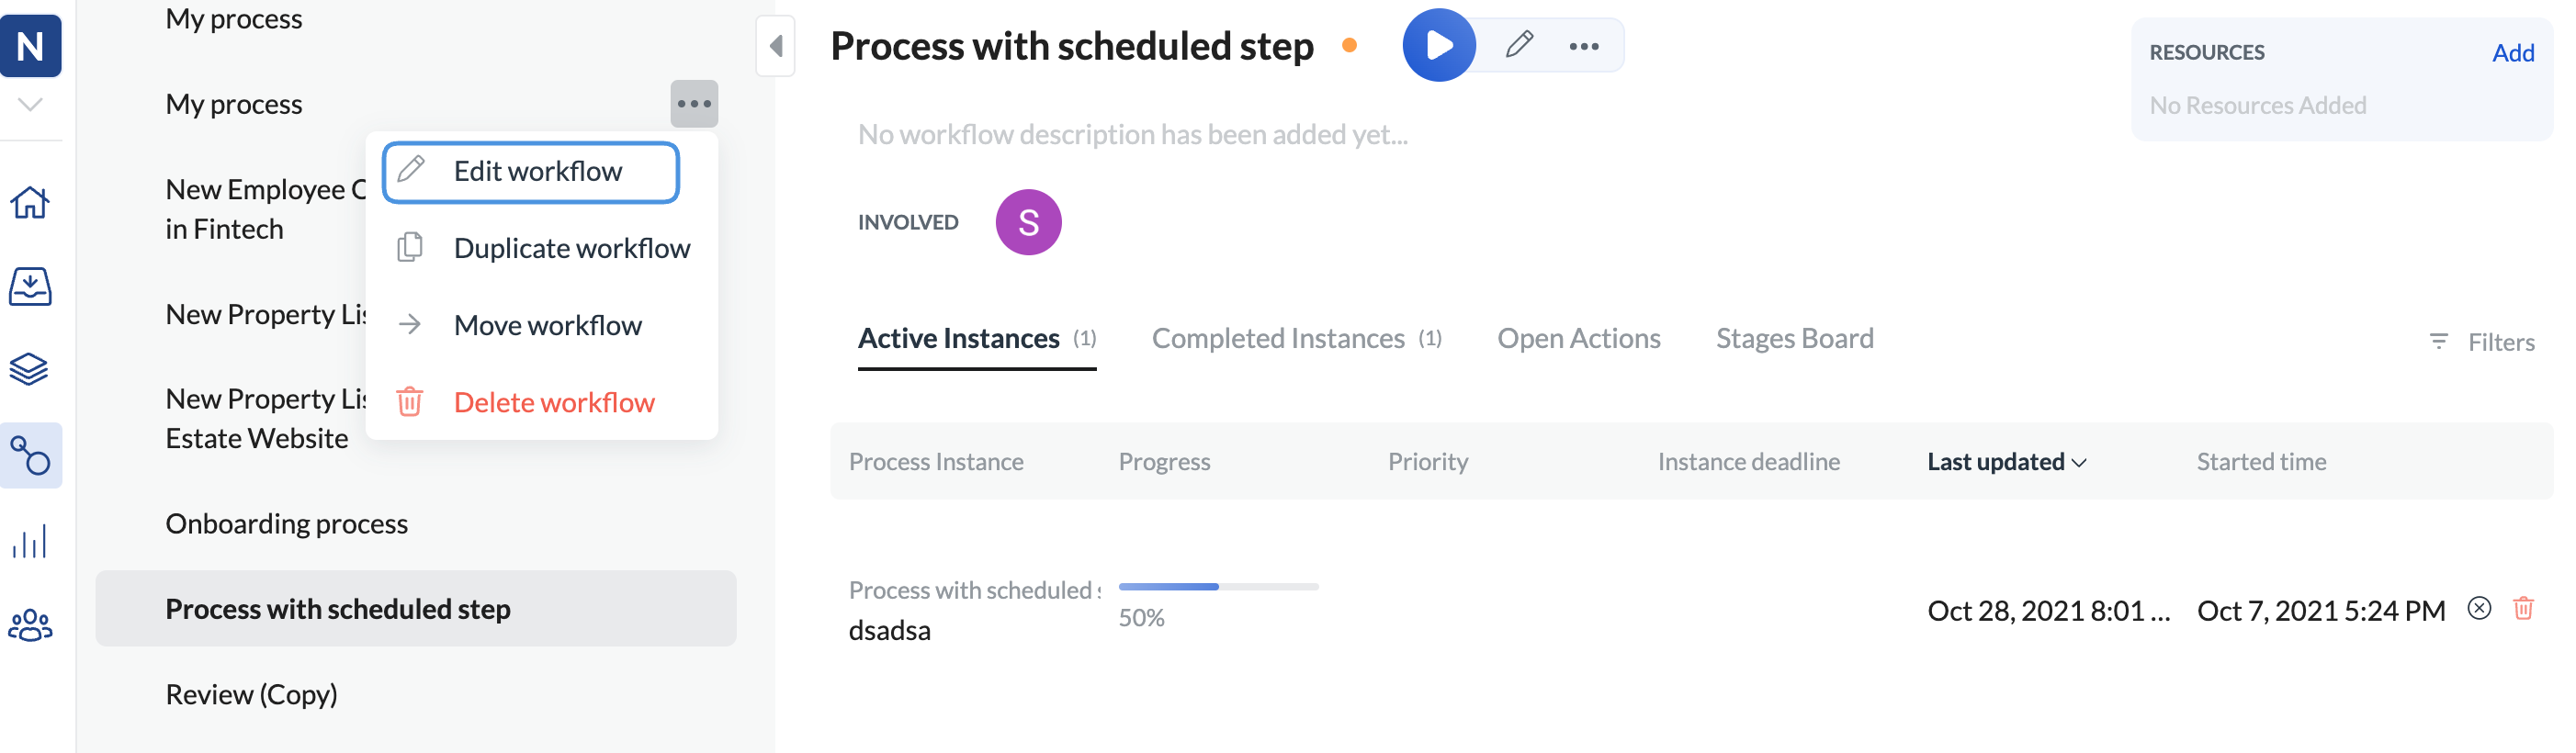
3. Click **Edit workflow**.
## Workflow overview
1. Add a template to your first workflow.
2. Edit the template settings for the trigger to work.
3. Start the workflow instance.
### 1. Add a template to your first workflow
1. In your left-hand navigation, click the **Workflow** icon.
2. Hover over the first workflow and click on the menu icon.
3. Click **Edit workflow**.
 1. Hover over the last step in your first workflow and click the plus icon.
2. Click **Templates > Next Matter templates > Launch workflow automatically**. This template will add extra steps to your workflow.
3. Click the **Launch** step.
4. Click the **Settings** cog icon. Now, edit the template settings to automatically trigger the follow-up step.
### 2. Edit the template settings for the trigger to work
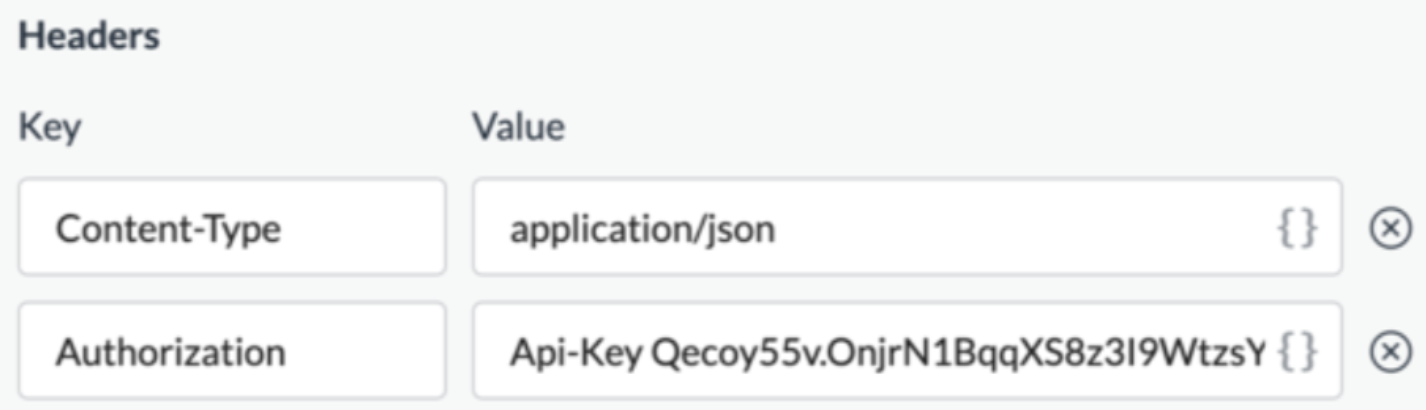
1. In the **Headers** section of **Settings**, enter your Api-Key. Note that you need the phrase Api-Key to go before the code in the field.
1. Hover over the last step in your first workflow and click the plus icon.
2. Click **Templates > Next Matter templates > Launch workflow automatically**. This template will add extra steps to your workflow.
3. Click the **Launch** step.
4. Click the **Settings** cog icon. Now, edit the template settings to automatically trigger the follow-up step.
### 2. Edit the template settings for the trigger to work
1. In the **Headers** section of **Settings**, enter your Api-Key. Note that you need the phrase Api-Key to go before the code in the field.
 2. Select **Raw** as **Body type**.
3. In the **Body** section, enter the workflow number.
To do that, delete `WORKFLOW_ID` and replace it with the real ID of the follow-up workflow that you have copied from the URL in your browser. This is an example of what your **Body** might look like:
```json JSON theme={null}
{
"process": "https://core.nextmatter.com/api/processes/15723/"
}
```
4. Decide what should happen if the step fails (**On Failure**).
5. Save your changes.
Remember to delete the step with instructions that's added to the template. If you don't want to send data from the first to the follow-up instance, delete the **Send data** step as well. If you need to send data, see [Send data to another workflow](/docs/send-data-to-a-step-in-another-process).
### 3. Start the workflow instance
1. In the left-hand navigation, click **Workflows**.
2. Click the first workflow.
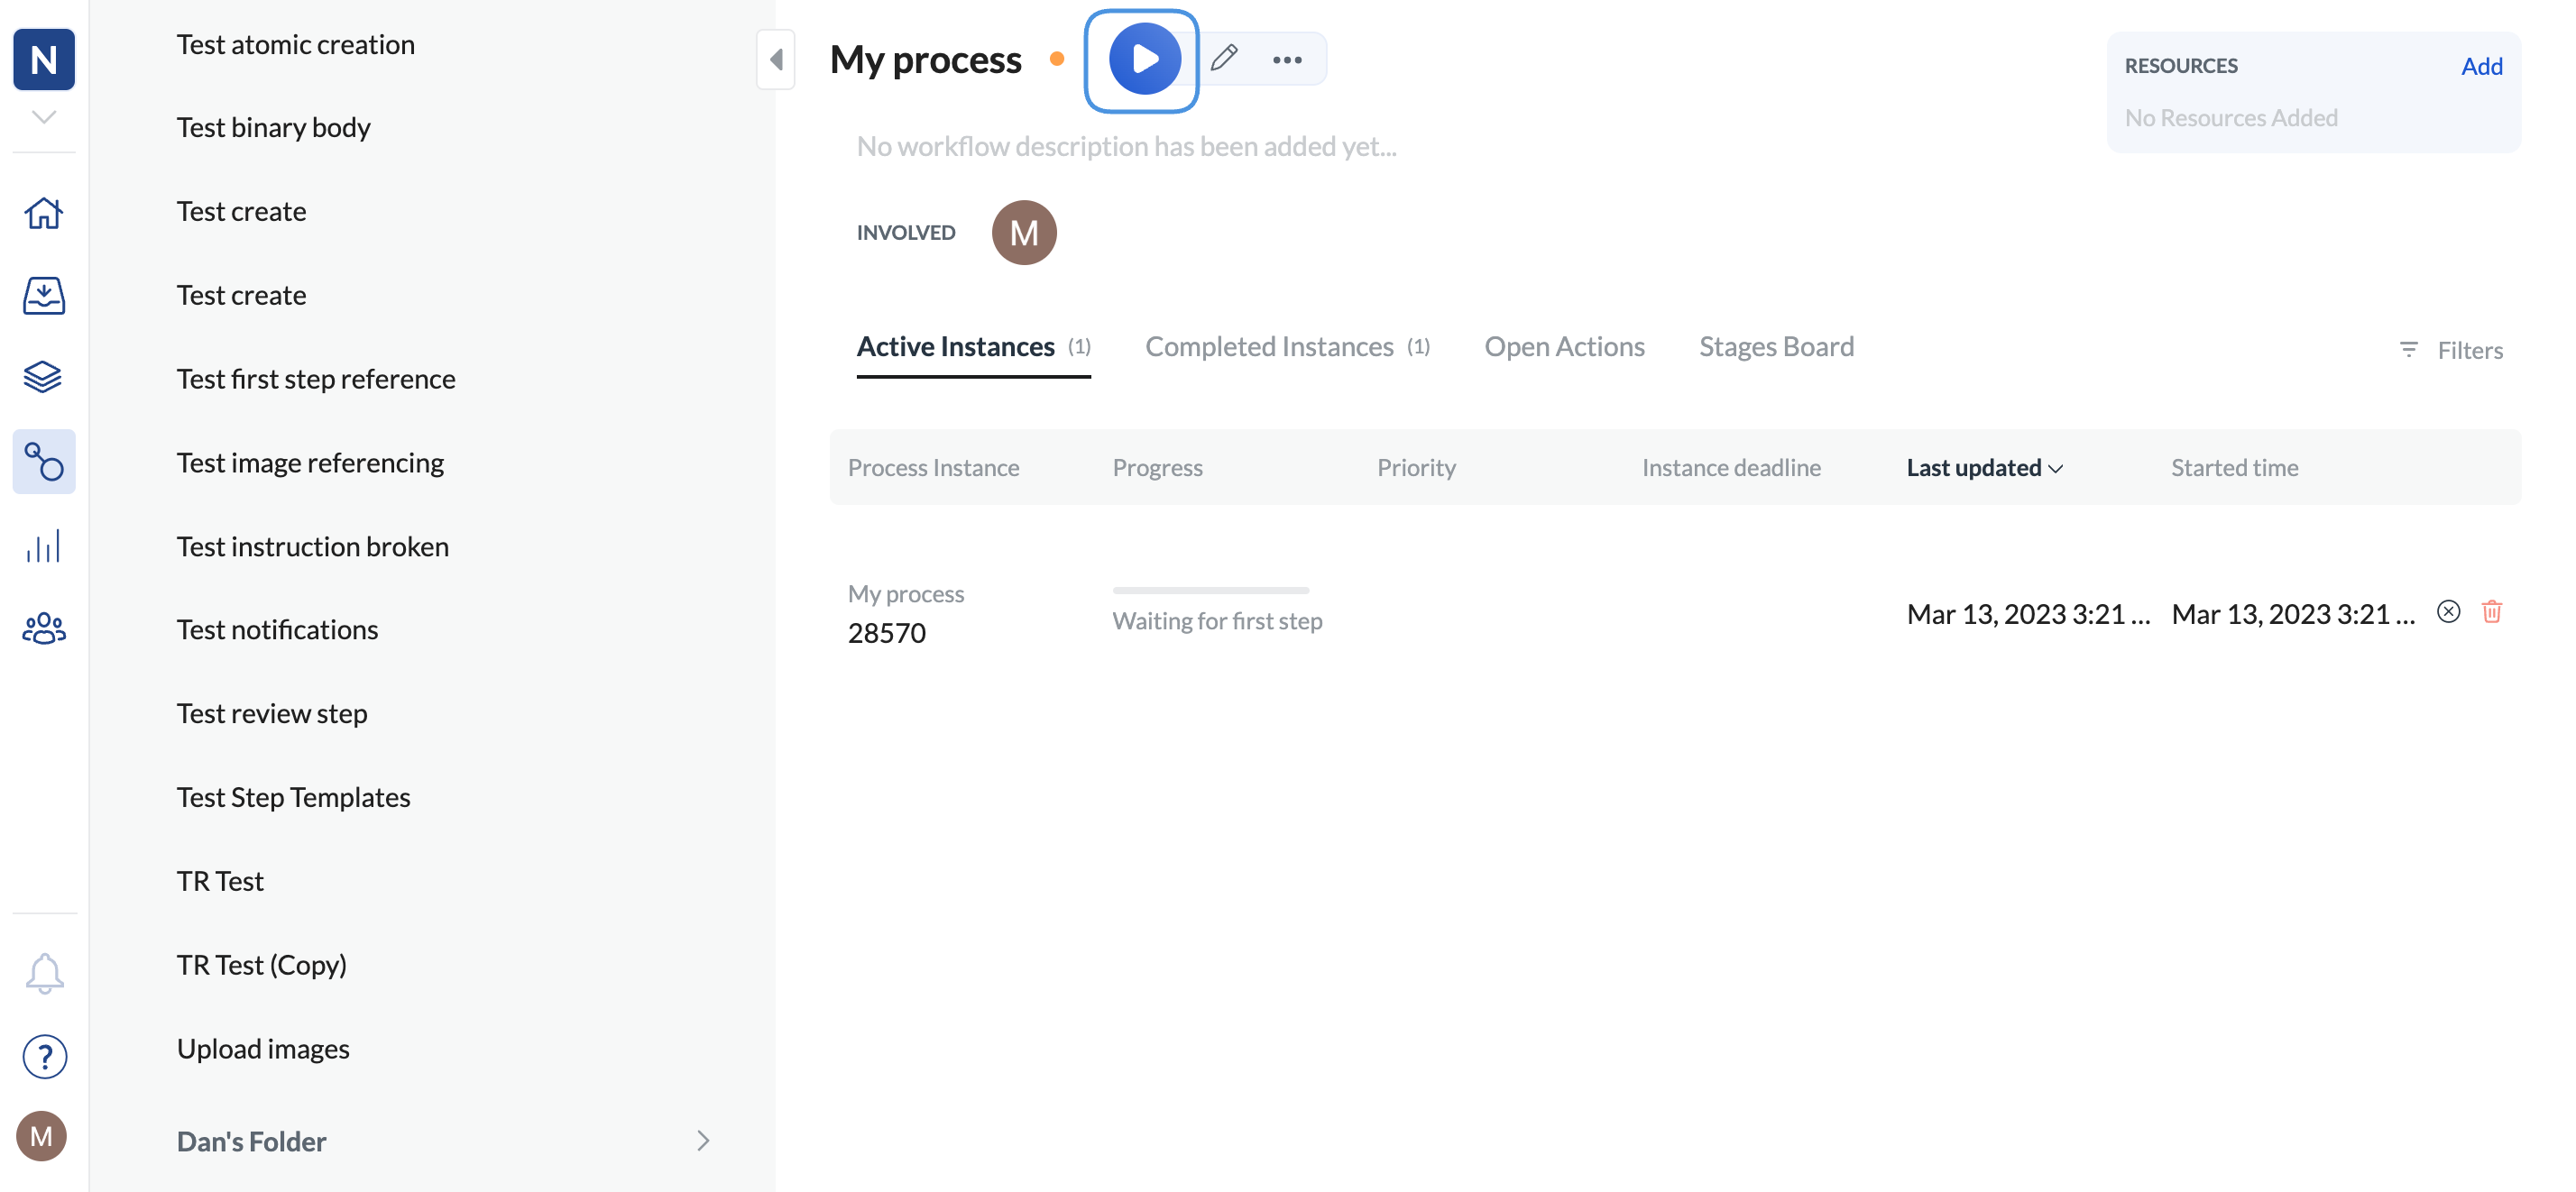
3. Click the play icon.
2. Select **Raw** as **Body type**.
3. In the **Body** section, enter the workflow number.
To do that, delete `WORKFLOW_ID` and replace it with the real ID of the follow-up workflow that you have copied from the URL in your browser. This is an example of what your **Body** might look like:
```json JSON theme={null}
{
"process": "https://core.nextmatter.com/api/processes/15723/"
}
```
4. Decide what should happen if the step fails (**On Failure**).
5. Save your changes.
Remember to delete the step with instructions that's added to the template. If you don't want to send data from the first to the follow-up instance, delete the **Send data** step as well. If you need to send data, see [Send data to another workflow](/docs/send-data-to-a-step-in-another-process).
### 3. Start the workflow instance
1. In the left-hand navigation, click **Workflows**.
2. Click the first workflow.
3. Click the play icon.
 4. Give the workflow instance a meaningful name.
5. Click **Start instance**.
When the first workflow instance has completed, it will automatically trigger the follow-up process instance. To verify that the follow-up workflow instance completed, click the follow-up workflow. Next, click the **Completed Instances**. Your follow-up workflow should show as **Completed**.
4. Give the workflow instance a meaningful name.
5. Click **Start instance**.
When the first workflow instance has completed, it will automatically trigger the follow-up process instance. To verify that the follow-up workflow instance completed, click the follow-up workflow. Next, click the **Completed Instances**. Your follow-up workflow should show as **Completed**.