> ## Documentation Index
> Fetch the complete documentation index at: https://help.nextmatter.com/llms.txt
> Use this file to discover all available pages before exploring further.
# Send data to another workflow
> You might want to send data entered in one workflow to a step in another workflow.
Such data transfers are especially useful when one process triggers a follow-up workflow. Then the data from the first workflow can be used in the follow-up one.
To do this task, make sure you've completed [Start a follow-up workflow](/docs/start-a-follow-up-process).
## Before you begin
In this task, you'll need the ID of the step **you'll be sending the data to** (in the follow-up workflow) and the ID of the form field **to be filled by** the data from the previous step.
Where is the step ID
1. In your left-hand navigation, click the **Workflows** icon.
2. Hover over the follow-up workflow and click on the menu icon.
3. Click **Edit workflow**.
4. Click the step to which you'd like to send data.
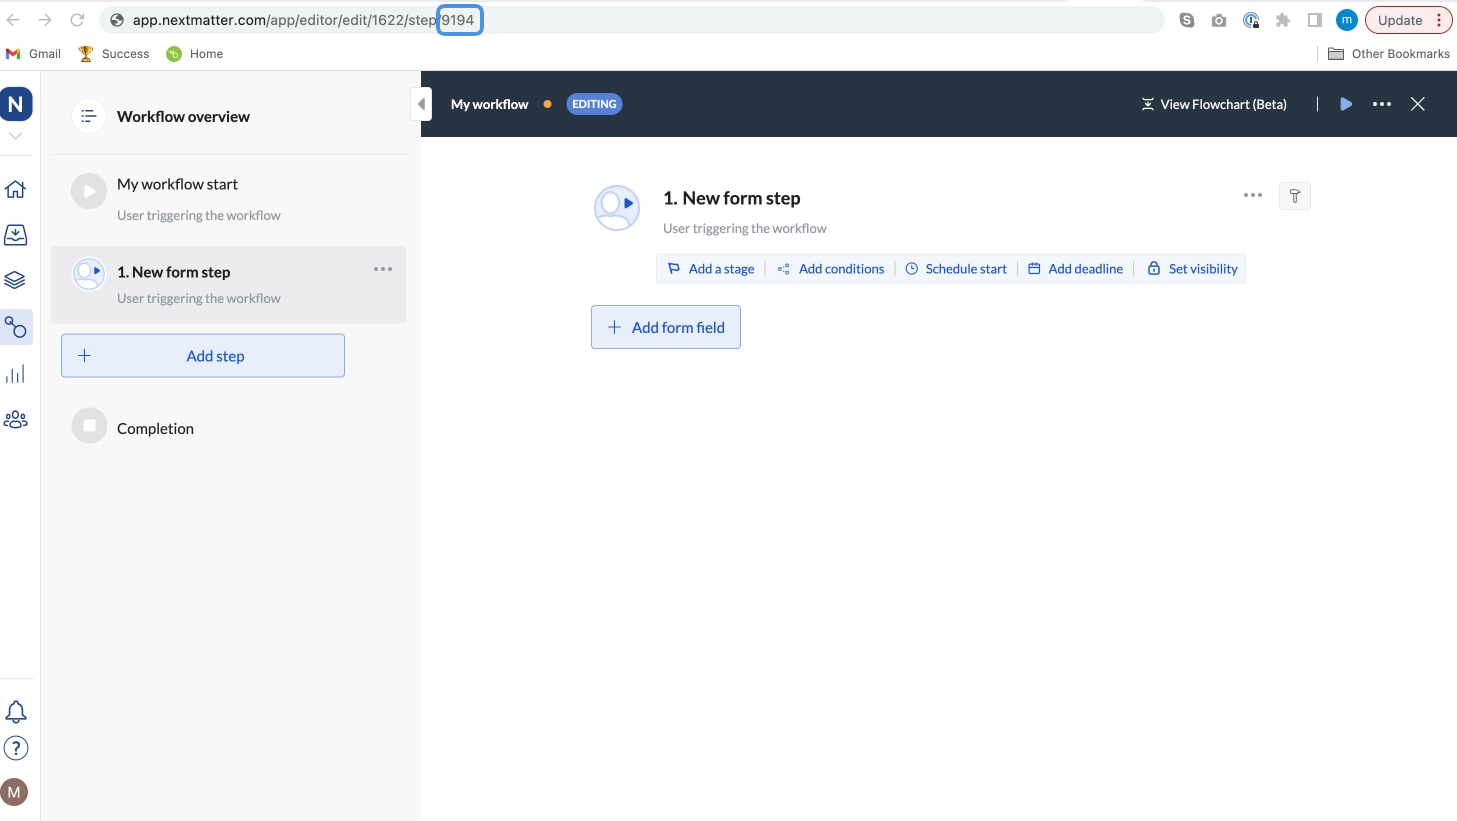
5. Copy the step ID. It's the last number in the URL you see in your browser.
 1. In your left-hand navigation, click the **Workflows** icon.
2. Hover over the follow-up workflow and click on the menu icon.
3. Click **Edit workflow**.
4. Click the step to which you'd like to send data.
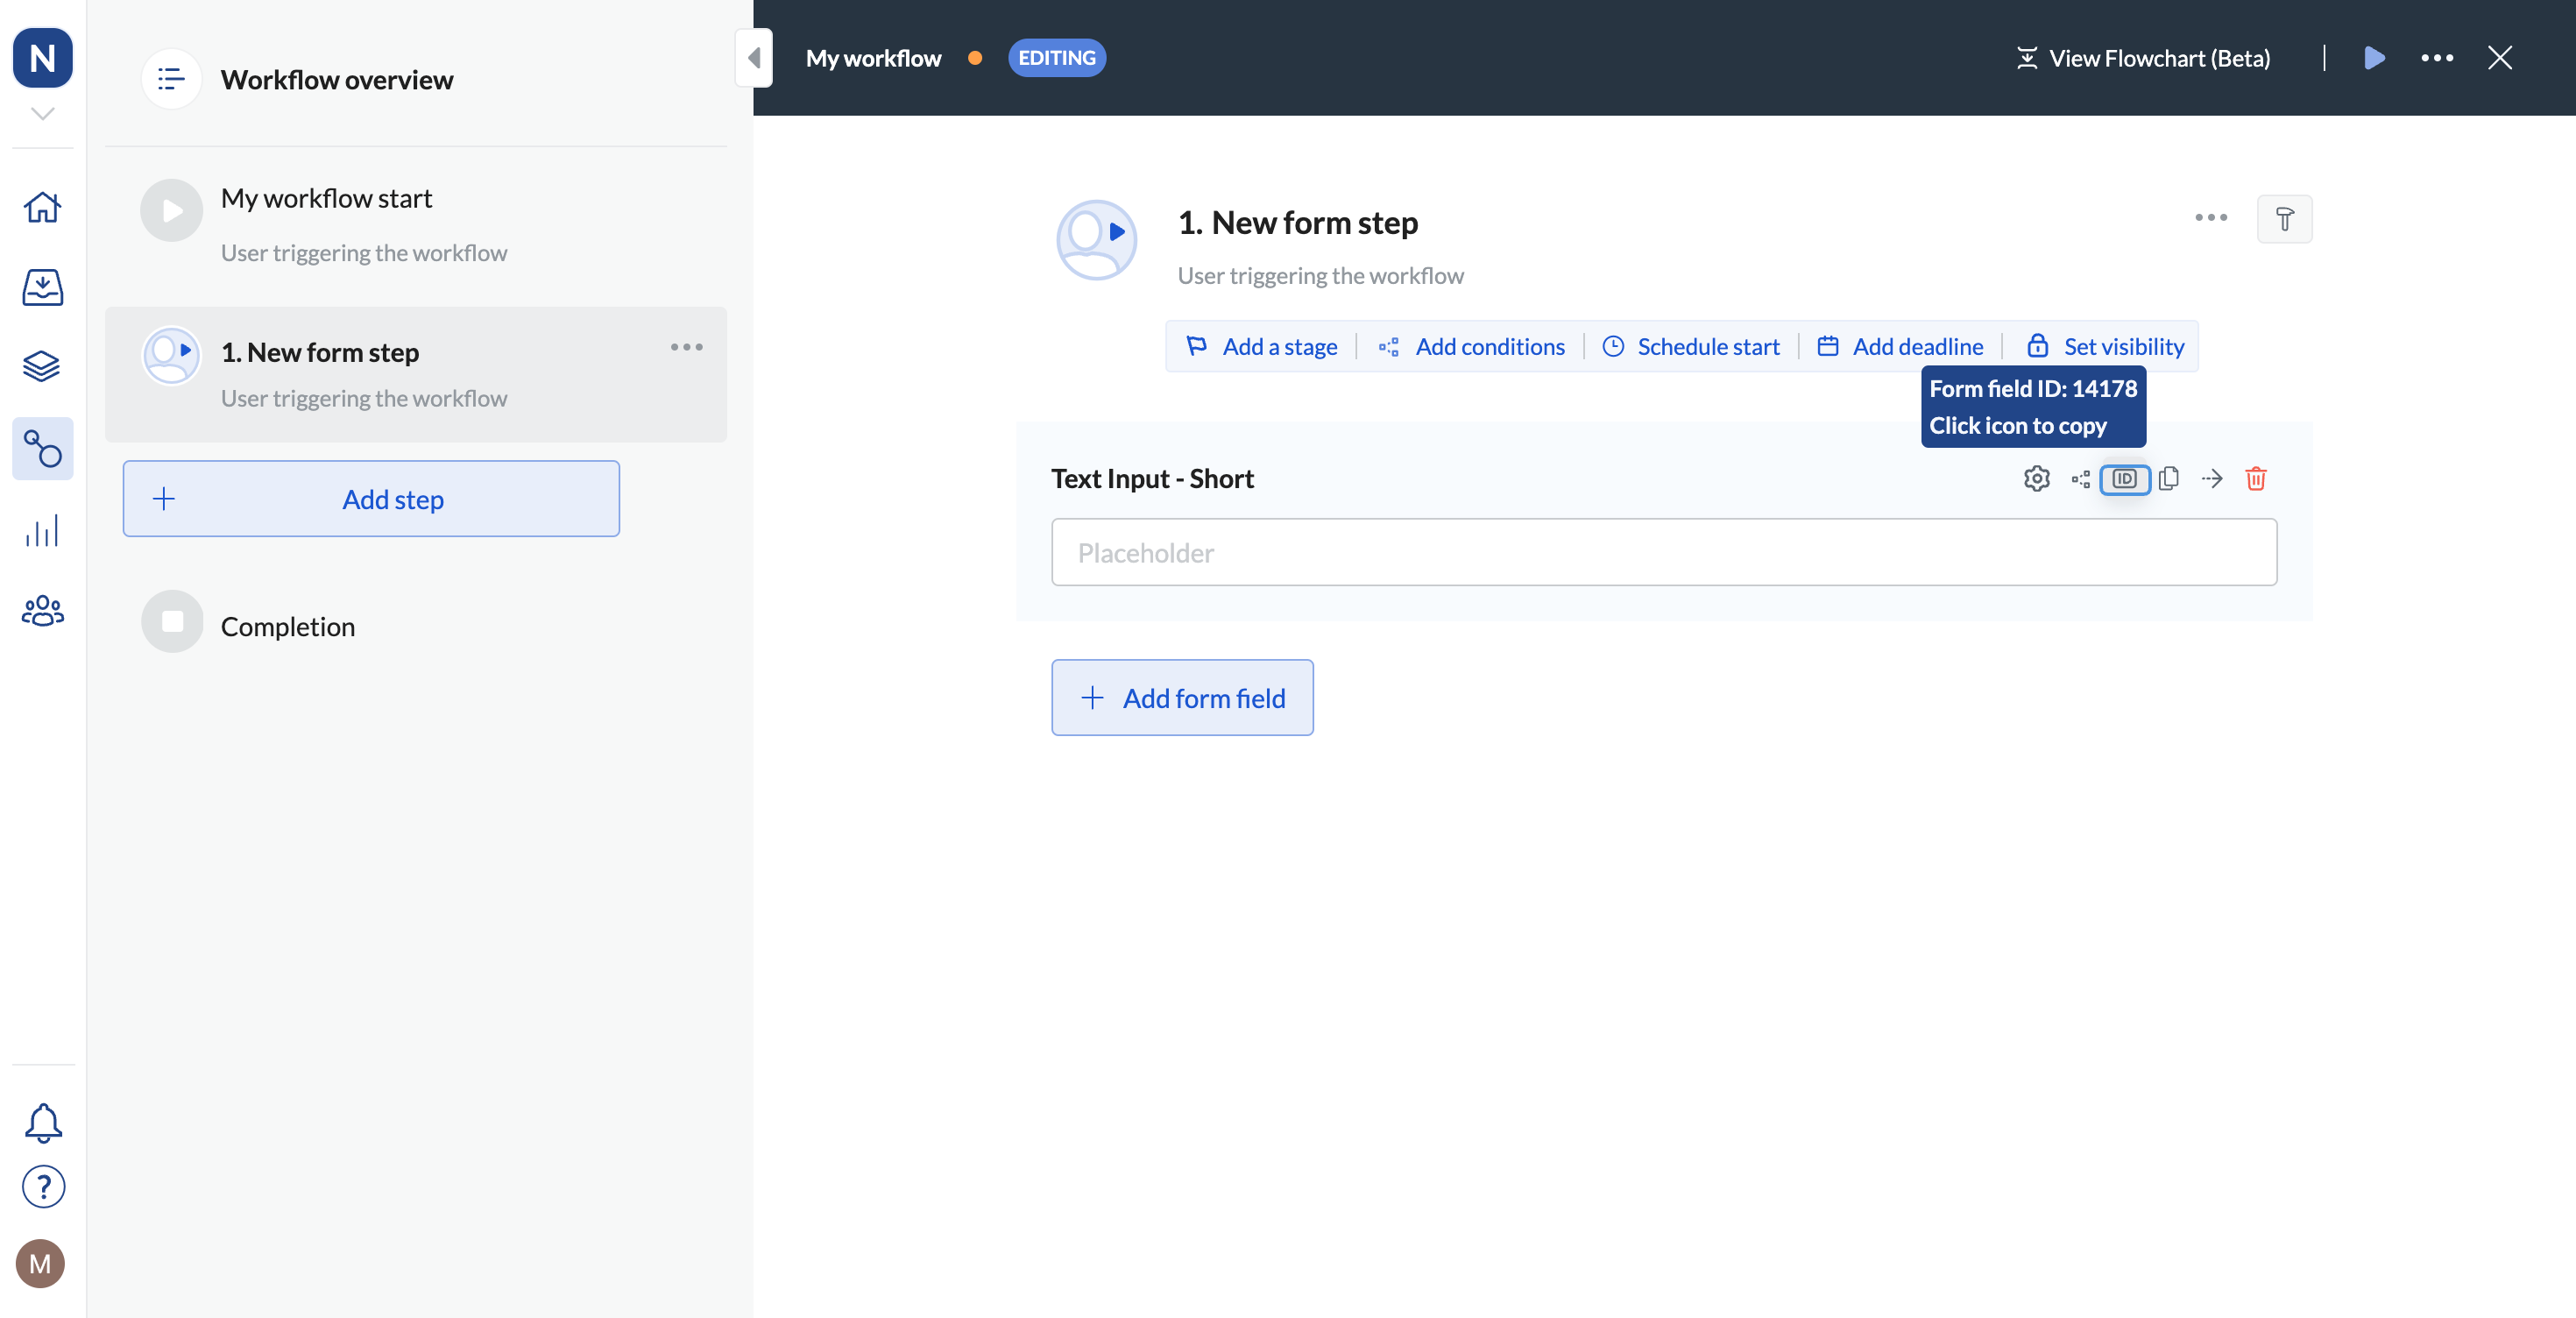
5. Click the ID icon for the field to which you want to copy data.
6. Copy **Form field ID**.
1. In your left-hand navigation, click the **Workflows** icon.
2. Hover over the follow-up workflow and click on the menu icon.
3. Click **Edit workflow**.
4. Click the step to which you'd like to send data.
5. Click the ID icon for the field to which you want to copy data.
6. Copy **Form field ID**.
 ## Send the data
1. Click the first process that should trigger the follow-up workflow.
2. Click **...** and select **Edit workflow**.
3. Click the **Send Data** step that's been automatically added when you selected the **Launch workflow automatically** template. If you need information on selecting this template, see [Start a follow-up workflow](/docs/start-a-follow-up-process).
4. Click the **Settings** cog icon.
5. In the **Headers** section of **Settings**, enter your Api-Key. Note that you need the phrase **Api-Key** to go before the code in the field.
6. Select **Raw** as **Body** type.
7. Edit **Body** as follows: a) Delete the STEP\_ID and ACTION\_ID, and replace them with the numbers you copied from the URLs. b) Delete the ADD\_YOUR\_OWN\_DATA and click {}. c) Select the type of data to fill in in the follow-up workflow. You need to tell the system what type of data belongs to which field.
**Note:** You need to select **ALL** the fields that have been marked as **Required** in the follow-up workflow. For example, if you decide to fill in the data only in one required field, the whole **Send Data** step will fail.
1. In the left-hand navigation, click the **Workflows** icon.
2. Hover over a process.
3. Click **Edit workflow**.
4. Click a step in the workflow.
5. Click the **Settings** cog icon.
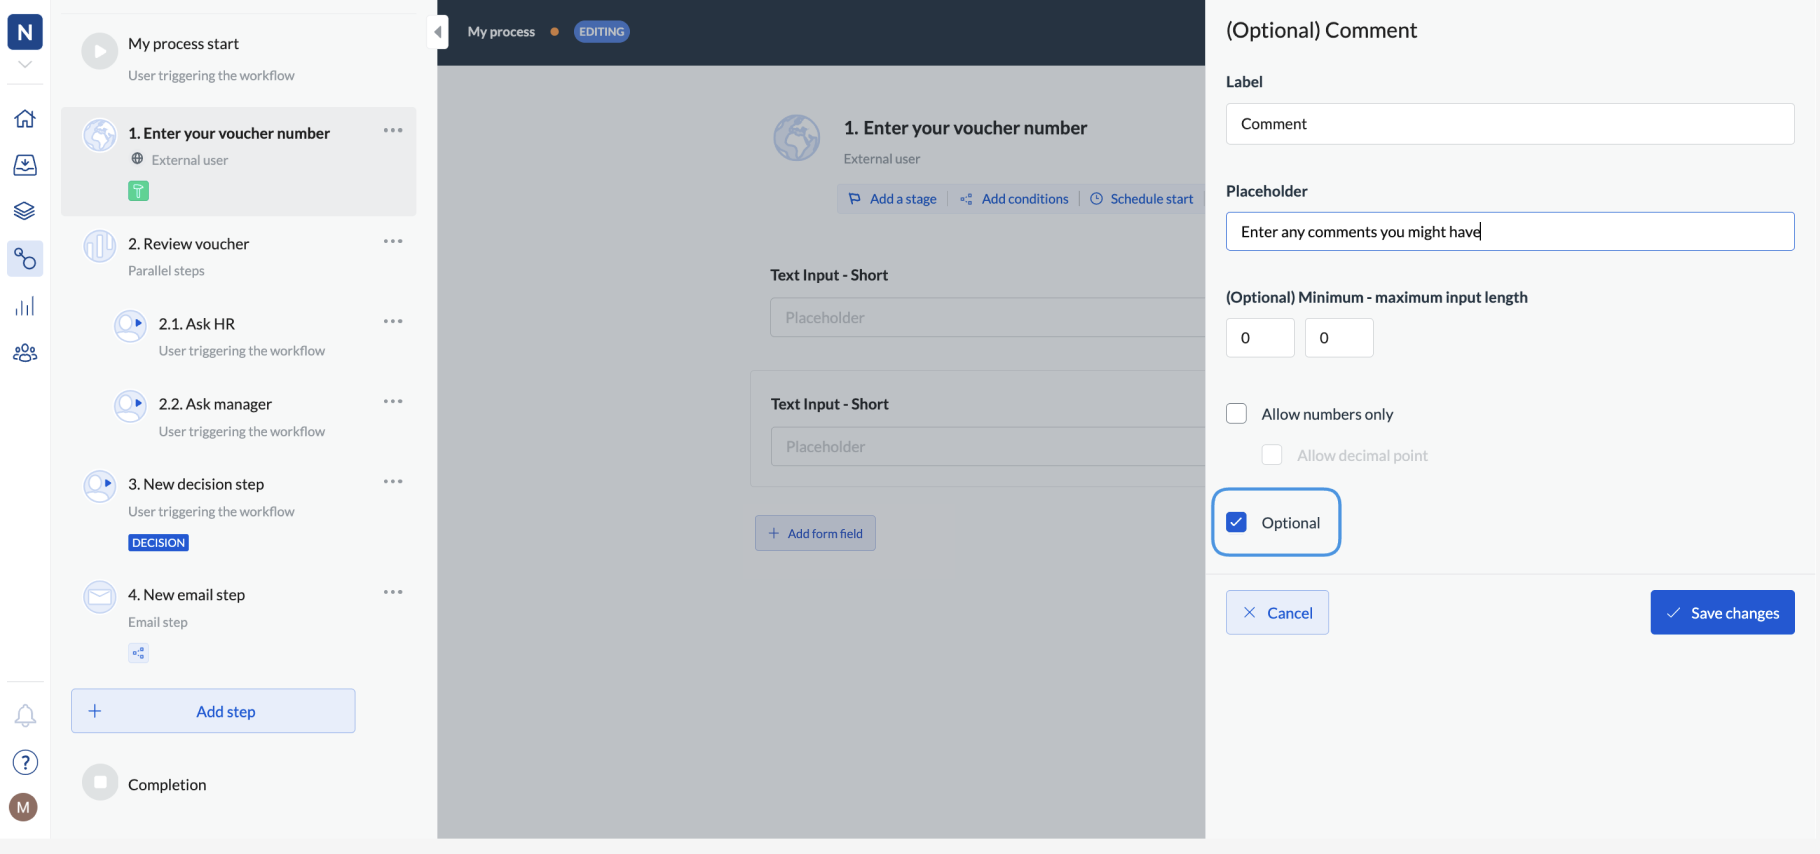
6. Verify whether the **Optional** box has been selected. If not, the field is required.
## Send the data
1. Click the first process that should trigger the follow-up workflow.
2. Click **...** and select **Edit workflow**.
3. Click the **Send Data** step that's been automatically added when you selected the **Launch workflow automatically** template. If you need information on selecting this template, see [Start a follow-up workflow](/docs/start-a-follow-up-process).
4. Click the **Settings** cog icon.
5. In the **Headers** section of **Settings**, enter your Api-Key. Note that you need the phrase **Api-Key** to go before the code in the field.
6. Select **Raw** as **Body** type.
7. Edit **Body** as follows: a) Delete the STEP\_ID and ACTION\_ID, and replace them with the numbers you copied from the URLs. b) Delete the ADD\_YOUR\_OWN\_DATA and click {}. c) Select the type of data to fill in in the follow-up workflow. You need to tell the system what type of data belongs to which field.
**Note:** You need to select **ALL** the fields that have been marked as **Required** in the follow-up workflow. For example, if you decide to fill in the data only in one required field, the whole **Send Data** step will fail.
1. In the left-hand navigation, click the **Workflows** icon.
2. Hover over a process.
3. Click **Edit workflow**.
4. Click a step in the workflow.
5. Click the **Settings** cog icon.
6. Verify whether the **Optional** box has been selected. If not, the field is required.
 If you have two required fields in the follow-up workflow, this is what your **Body** might look like:
```json JSON theme={null}
{
"step_id":220135,
"actions":[
{
"action_id":535159,
"input_object":{
"inputValue":"{1. Provide details - Lead Name - Input (plain)}"
}
},
{
"action_id":535736,
"input_object":{
"inputValue":"{1. Provide details - Lead Email - Input (plain)}"
}
}
]
}
```
8. Decide what should happen if the step fails (**On Failure**).
9. Save your changes.
Now, when you start a process instance that will trigger another workflow instance, this follow-up workflow instance will have the data from the first workflow filled in in the appropriate fields.
If you have two required fields in the follow-up workflow, this is what your **Body** might look like:
```json JSON theme={null}
{
"step_id":220135,
"actions":[
{
"action_id":535159,
"input_object":{
"inputValue":"{1. Provide details - Lead Name - Input (plain)}"
}
},
{
"action_id":535736,
"input_object":{
"inputValue":"{1. Provide details - Lead Email - Input (plain)}"
}
}
]
}
```
8. Decide what should happen if the step fails (**On Failure**).
9. Save your changes.
Now, when you start a process instance that will trigger another workflow instance, this follow-up workflow instance will have the data from the first workflow filled in in the appropriate fields.