> ## Documentation Index
> Fetch the complete documentation index at: https://help.nextmatter.com/llms.txt
> Use this file to discover all available pages before exploring further.
# Integrate with Docusign
> You might want to send documents that are part of the Next Matter workflow to sign with Docusign. Integrate with Docusign to manage document signing end to end.
Check out our ready-made templates available when you add a step and select **Templates > 3rd party templates**. You can use the templates to create a set of pre-configured steps. Need a specific template? Click the **Contact us** button in the top right of the page and let us know.
## Before you begin
* To connect Docusign, you first need to generate your Docusign Account ID and then connect Docusign and Next Matter.
## 1. Get the details from Docusign
1. Sign in to Docusign as an administrator.
2. Navigate to **Settings > Apps and Keys**.
3. Copy the **Account API ID** that is displayed in **My Account Information**.
## 2. Connect to Next Matter
1. In your Next Matter portal, go to **Automations library**.
2. Click **Connect** in the Docusign app tile.
3. Follow the prompts to allow access for Next Matter to create and send envelopes.
## 3. Build your process with Docusign integration
## Upload the files to Next Matter and send them to sign
1. Select the Next Matter workflow that should integrate with Docusign.
2. Click **Edit workflow**.
3. Click **Add step** and select **Integrations** as the step type.
4. Select DocuSign as the integration.
5. Click the step to open it.
6. Click **Settings**.
7. Select POST as the Method and enter the following URL:
```http HTTPS theme={null}
URL: https://eu.docusign.net/restapi/v2.1/accounts/API_ACCOUNT_ID/envelopes
```
Note that this URL is set to European instances of Docusign. You might want to check where your instance is hosted.
8. Select DocuSign from the drop-down in the **Authorization** field in the **Headers** section.
9. Enter the Body of the request. It might look like the following:
```json JSON theme={null}
{
"emailSubject": "Please sign this document",
"documents": [{
"documentBase64": "{File Upload - First file (base64)}",
"name": "Employment Contract",
"fileExtension": "pdf",
"documentId": "1"
}],
"recipients": {
"signers": [{
"name": "John Doe",
"email": "[email protected]",
"recipientId": "1",
"routingOrder": "1",
"tabs": {
"signHereTabs": [{
"anchorString": "**signature_1**",
"anchorUnits": "pixels",
"anchorXOffset": "20",
"anchorYOffset": "10"
}]
}
}],
"carbonCopies": [{
"name": "Jane Smith",
"email": "[email protected]",
"recipientId": "2",
"routingOrder": "1",
}]
},
"status": "sent"
}
```
Make sure there is a form step with a field to upload the DocuSign document that proceeds the integration step.
There can be multiple uploaded files but each needs the base64 encoding format as the Data reference.
10. Click **Save changes**.
#### Considerations
* The **Sign** field specified in the example above is one of many fields (called [Tabs in Docusign](https://developers.docusign.com/docs/esign-rest-api/reference/envelopes/enveloperecipienttabs/)) that can be configured. You can add configure fields per recipient and assign each recipient different fields to fill in. Configure these fields in the tabs parameter.
* The position of the field in the document is specified by the `anchorOffset`.
* For each recipient, you can configure the name and email either with predefined values or using data references from previous form fields. Each recipient has a different recipient ID, so just increase the ID by one each time a new one is included. For details on. recipients, see [Docusign documentation](https://developers.docusign.com/docs/esign-rest-api/reference/envelopes/enveloperecipients/). The above example uses the signer and the person receiving a carbon copy.
* The `sent` status indicates that an envelope will be created and directly sent.
## Send an Envelope Template to sign
1. Select the Next Matter workflow that should integrate with Docusign.
2. Click **Edit workflow**.
3. Click **Add step** and select **Integrations** as the step type.
4. Select Docusign as the integration.
5. Click the step to open it.
6. Click **Settings**.
7. Select POST as the Method and enter the following URL:
```http HTTPS theme={null}
URL: https://eu.docusign.net/restapi/v2.1/accounts/API_ACCOUNT_ID/envelopes
```
8. In **Authorization**, select Docusign.
9. Enter the Body of the request. It might look like the following:
```json JSON theme={null}
{
"templateId": "ENVELOPE_TEMPLATE_ID",//this is a placeholder
"templateRoles": [
{
"name": "John Doe",
"email": "[email protected]",
"recipientId": "1",
"roleName": "signer",
"tabs": {
"textTabs": [{
"tabLabel": "Job Position",
"value": "Marketing manager"
},
{
"tabLabel": "Organization",
"value": "Organization"
}]
}
},
{
"name": "Jane Smith",
"email": "john@[company].com",
"recipientId": "2",
"roleName": "cc"
}],
"status": "sent"
}
```
#### Considerations
* You can get the Template ID from Docusign. Navigate to Templates and select the template to use. The template ID is at the top of the template.
* To get Docusign `recipientId`, see [Docusign documentation](https://developers.docusign.com/docs/esign-rest-api/how-to/get-envelope-recipients/).
* Each template has defined recipients, documents, and fields (tabs). The recipients for each envelope in Docusign are defined by a Rolename to identify them. Each recipient may have a different role type defined in the template itself. The document can contain custom fields created in Docusign. You can fill them out automatically in your Next Matter workflow. Each custom field is associated with one recipient. This is why the "tabs" attribute is defined per recipient. You can create a custom field, label it, and enter the value in the `tabLabel` attribute of the **Body**.
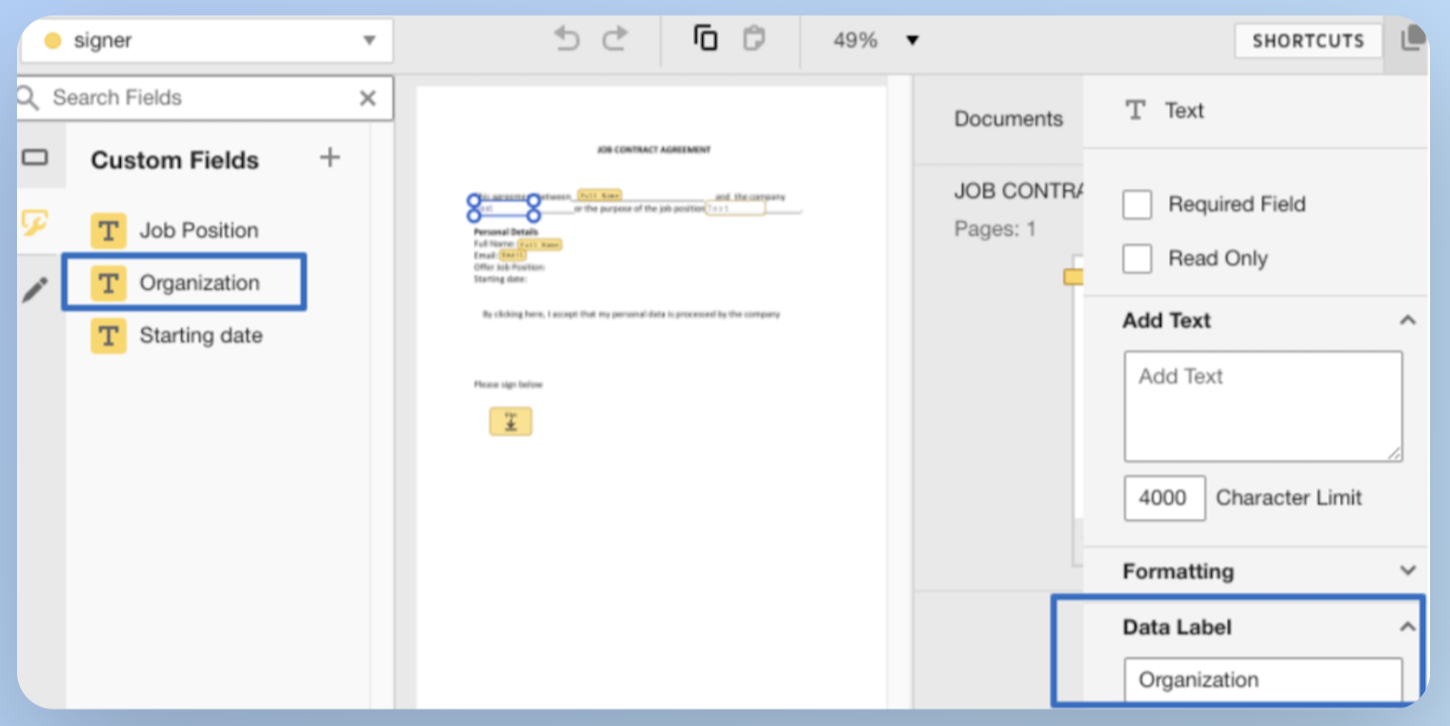 For more on creating custom fields in Docusign, watch [this Docusign tutorial](https://www.youtube.com/watch?v=kH09yhOCfMA).