> ## Documentation Index
> Fetch the complete documentation index at: https://help.nextmatter.com/llms.txt
> Use this file to discover all available pages before exploring further.
# Analyze text and images code-free with AI
> Use our no-code step to analyze, generate emails, forms, or chat replies, and process images.
## Before you begin
* In your Next Matter portal, go to **Automations library**, click **Connect** in the **OpenAI** app tile, and enter the OpenAI API token to connect.
## Use the integration
### Analyze or generate text
1. Click **Workflows > + Create new\... > Create a new workflow** and give your workflow a name. If you have a workflow ready, click **... > Edit workflow**.
2. Click **+ Add step** and select **Integrations > OpenAI**.
3. Click the step and click **Configure integration**.
4. Select **Process/generate text with AI** in **OpenAI action**.
5. Enter the prompt and select the AI model and the output type.
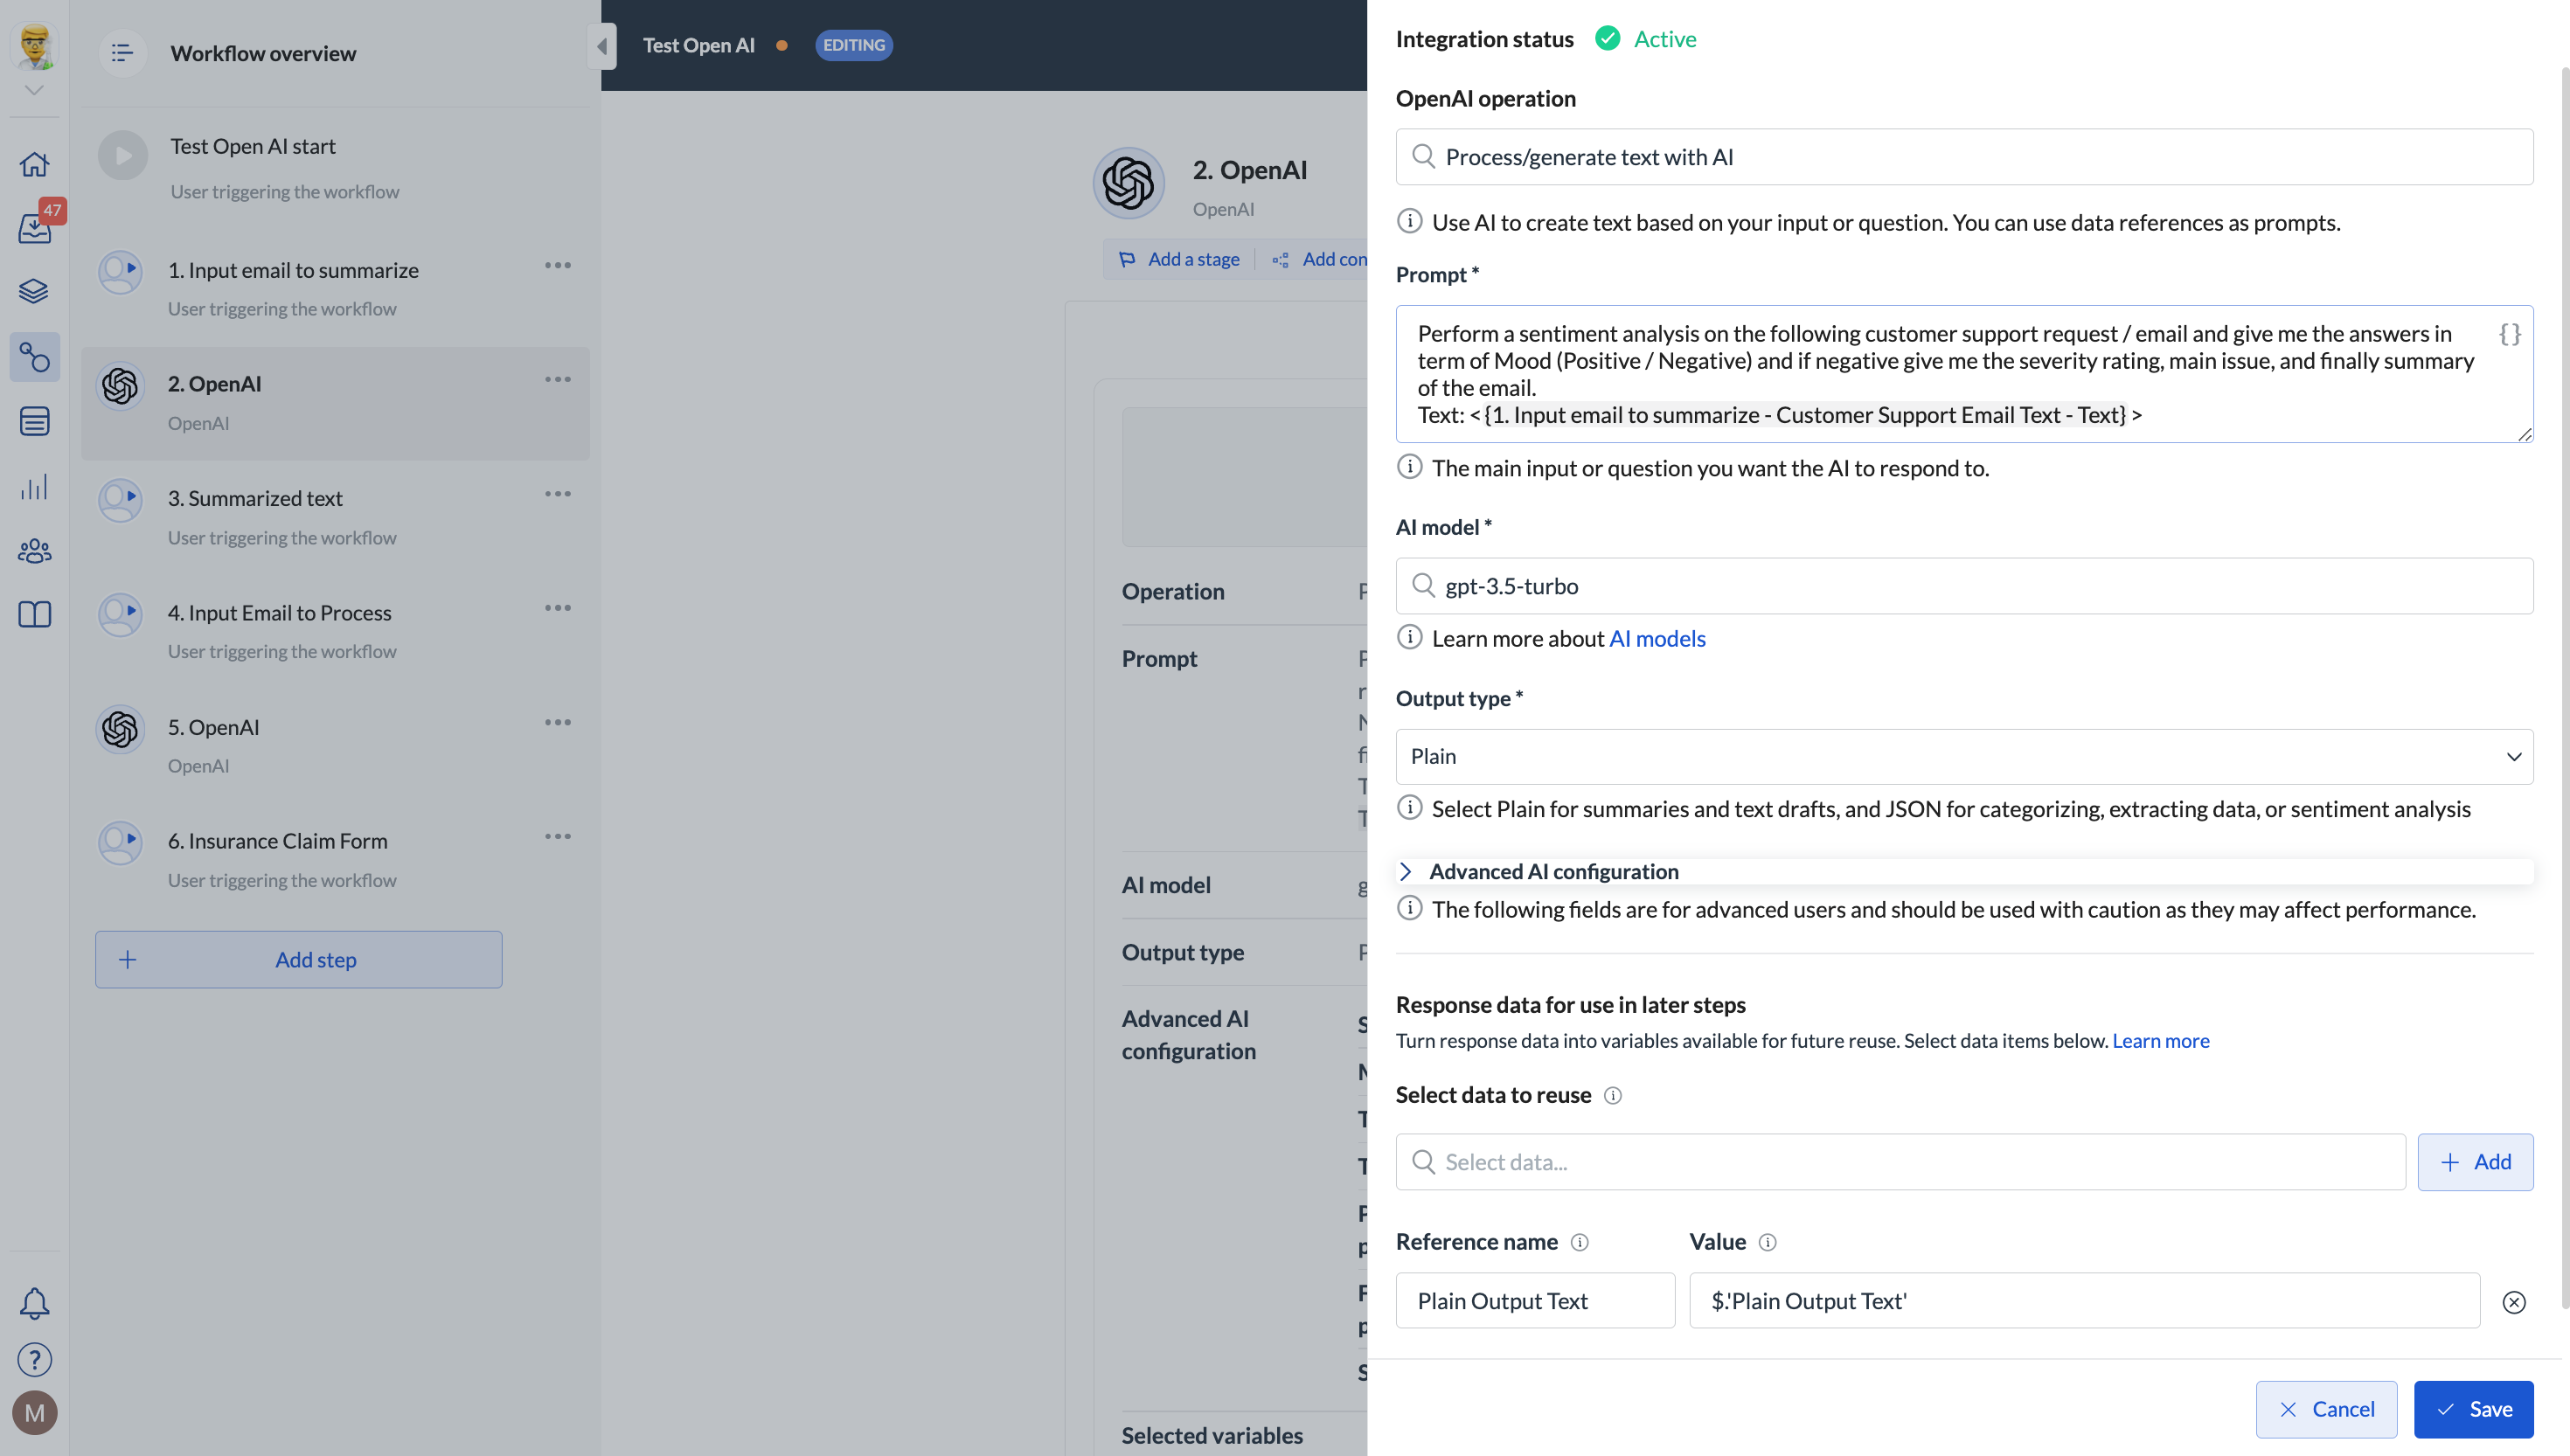 6. (Optional) If needed, you can tweak the request by providing data in the **Advanced AI configuration** dropdown.
7. Select the output text as a variable you can refer to later on.
8. Save your changes.
#### Use cases
* You can use the no-code step to, for example, analyze customer emails for the support team, surface the email's main points, and measure the sentiment.
* You can analyze customer emails to automatically input data into insurance claim forms that customers can review and confirm.
### Process images
1. Click **Workflows > + Create new\... > Create a new workflow** and give your workflow a name. If you have a workflow ready, click **... > Edit workflow**.
2. Click **+ Add step** and select **Integrations > OpenAI**.
3. Click the step and click **Configure integration**.
4. Select **Process images with AI** in **OpenAI action**.
6. (Optional) If needed, you can tweak the request by providing data in the **Advanced AI configuration** dropdown.
7. Select the output text as a variable you can refer to later on.
8. Save your changes.
#### Use cases
* You can use the no-code step to, for example, analyze customer emails for the support team, surface the email's main points, and measure the sentiment.
* You can analyze customer emails to automatically input data into insurance claim forms that customers can review and confirm.
### Process images
1. Click **Workflows > + Create new\... > Create a new workflow** and give your workflow a name. If you have a workflow ready, click **... > Edit workflow**.
2. Click **+ Add step** and select **Integrations > OpenAI**.
3. Click the step and click **Configure integration**.
4. Select **Process images with AI** in **OpenAI action**.
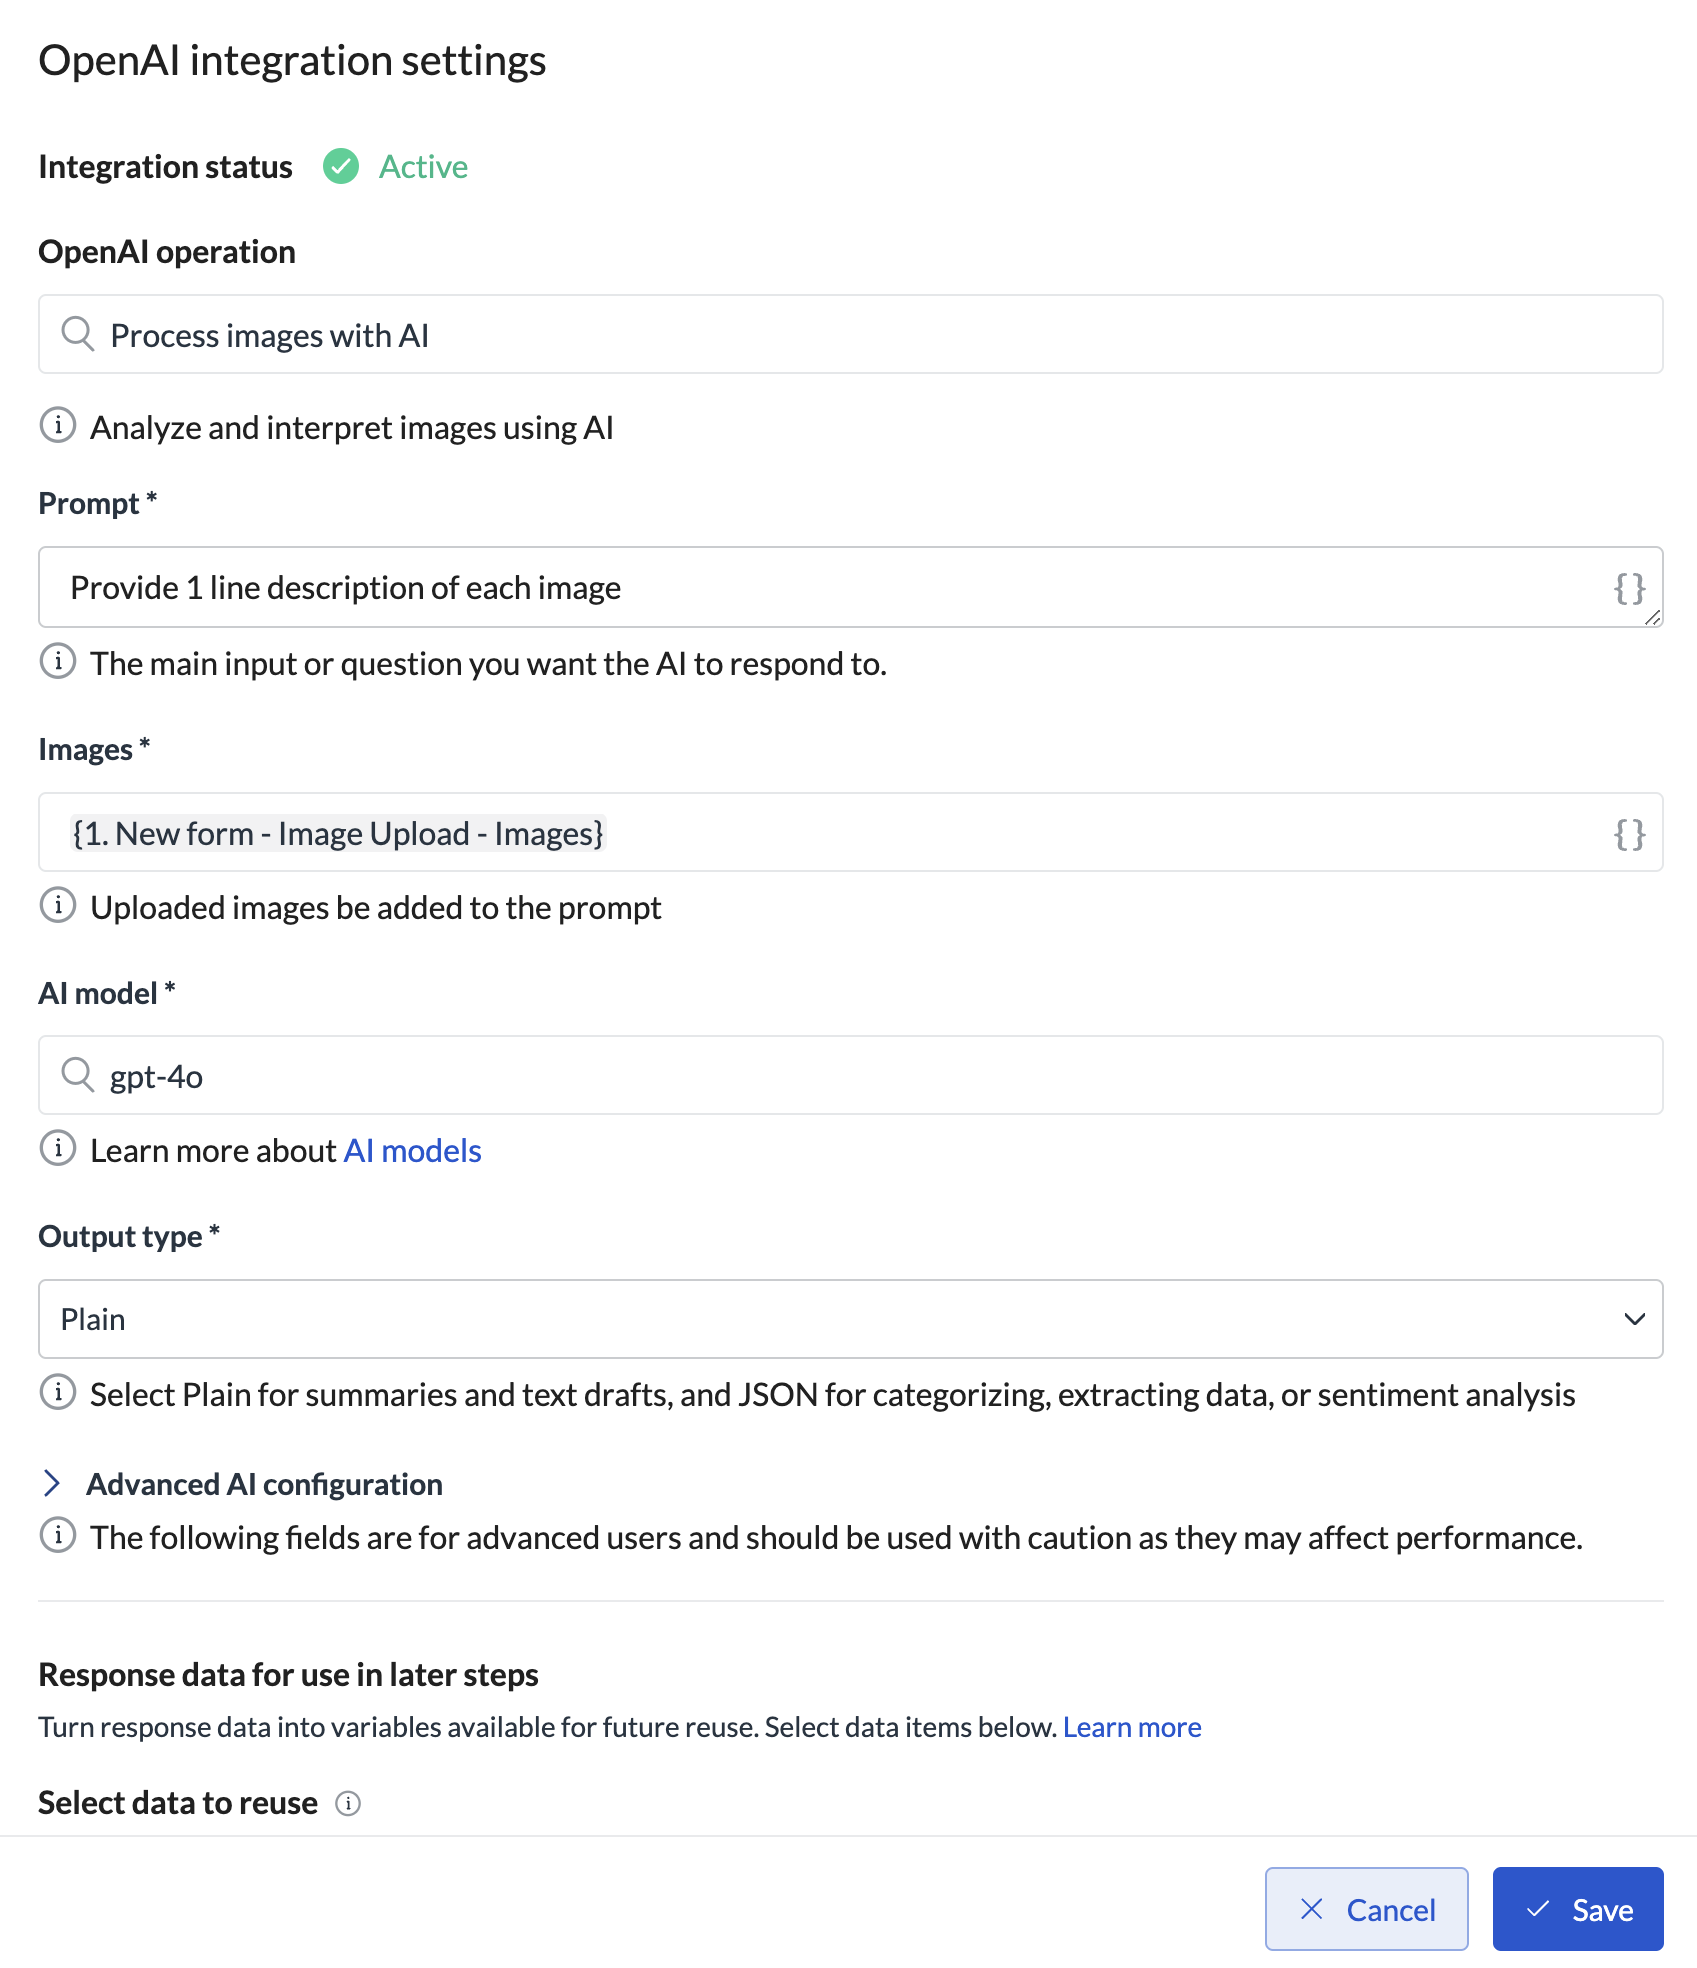 5. Enter the prompt and select the AI model and the output type.
6. Select the data reference to the images uploaded in any of the previous steps. Currently, we don't support files in PDF.
7. (Optional) If needed, you can tweak the request by providing data in the **Advanced AI configuration** drop-down. Tip: You can use floats to define Temperature but make sure to use "," (comma) instead of "." (point) for the German/ European lokale.
8. Select the output text as a variable you can refer to later on.
9. Save your changes.
Make sure the images do not exceed 30 megapixels each. Large images might cause the step to fail.
5. Enter the prompt and select the AI model and the output type.
6. Select the data reference to the images uploaded in any of the previous steps. Currently, we don't support files in PDF.
7. (Optional) If needed, you can tweak the request by providing data in the **Advanced AI configuration** drop-down. Tip: You can use floats to define Temperature but make sure to use "," (comma) instead of "." (point) for the German/ European lokale.
8. Select the output text as a variable you can refer to later on.
9. Save your changes.
Make sure the images do not exceed 30 megapixels each. Large images might cause the step to fail.